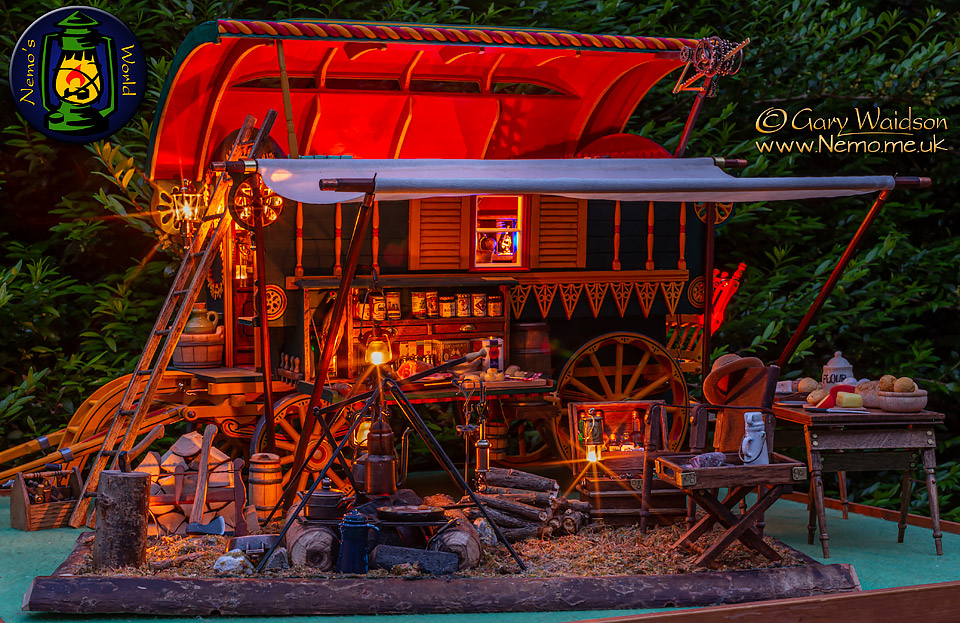
11th January MMXX
Recently, I restored and rewired a dolls house built by Deb's father back in 2000 and it reminded me how much I used to enjoy model making, which I haven't really done much of since I was a teenager.
I've had many interests in life and I've been fortunate enough to make a living pursuing some of them. The skills I learned in model making, for example, have also served me well in making the historical replicas so important to my living history presentations.
I quite like the 1/12th scale that many dolls houses use because of the wide range of accessories available and while looking for something for Deb's dolls house, I came across a Gypsy Caravan kit by McQueenie Miniatures
It's based on a classic "ledge" design of Living Van or "Vardo" used by the Romany Gypsies around the turn of the 19th/20th century. All the pictures I could find online made it look like quite an adaptable kit.
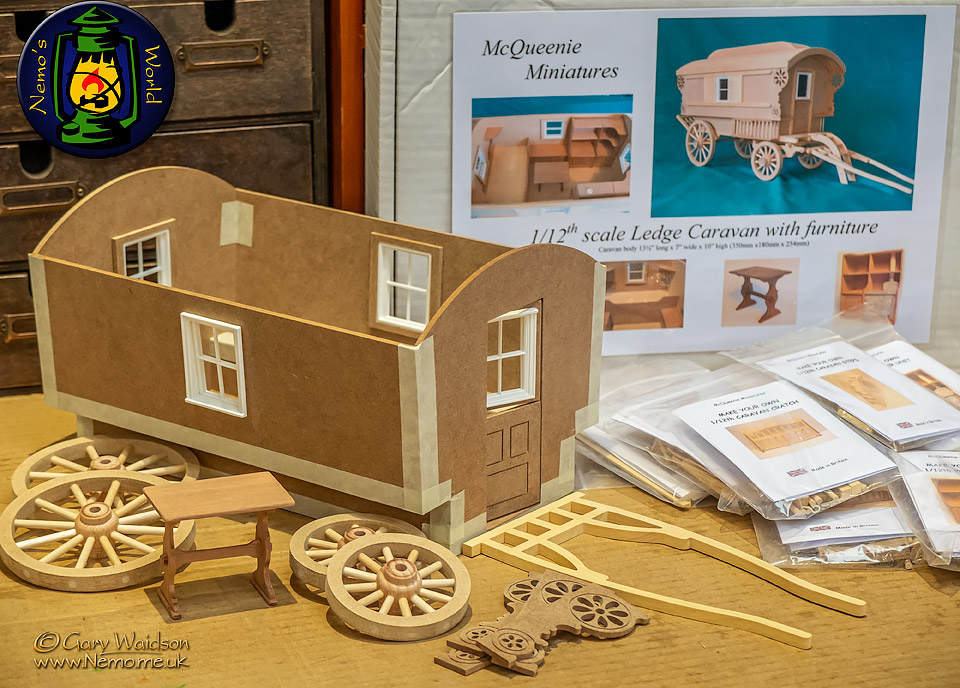
Being into retro camping and outdoor life, this appealed to me on many levels, My finger hit the order button and this is what arrived a few days later.
I've just taped the major parts together here to check the fit ( all good so far ) and suss out any modifications I would like to make. ( It wouldn't be me if I just built it as standard. )
The first proper job that needed to be done was mounting the doors on tiny hinges with even tinier little brass pins.
A fiddly job to say the least and only just enough pins supplied to do the job, which I thought was a little tight as I searched for one that had pinged out of the tweezers.
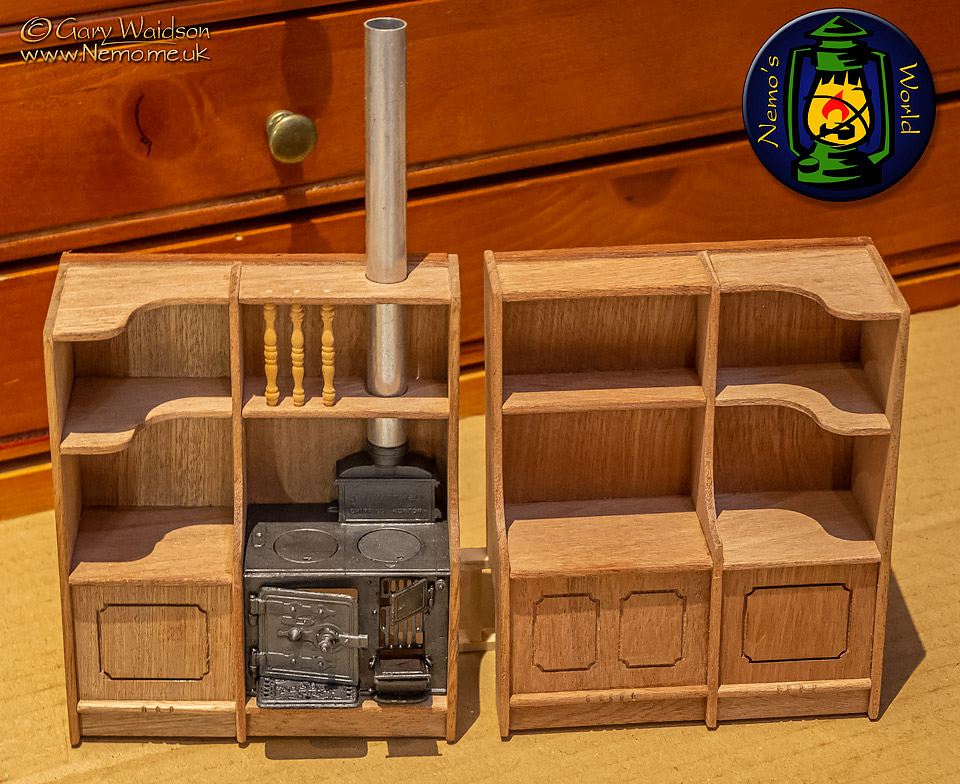
The first of the furnishings that I put together were the two internal cupboard units that came with the kit. Simple enough although I added some turned spindles to make a plate rack over the stove. Then I turned my attention to the white metal stove.
It was supplied with a wooden stove pipe which I swapped for a section of aluminium tube I found in the workshop and looking at the instructions it seemed that the stove doors were made to be glued either open or shut. Well there's my first challenge, that's not good enough for me, I want properly hinged doors...
Out came a pin vice and a fine drill bit. Sorting through Deb's pin cushion I found three suitable pins and the workshop provided some stainless steel wire to build hinges for the drop plate.
I drilled through the fixed hinge blocks on the stove wall first and the used the pins to mark where the blocks on the doors needed drilling. once both parts were drilled I put the pieces together and drilled them both with a half mm drill bit to make sure they were in line before gluing the pins to the door hinges.
An hour or so later, opening doors all sorted.
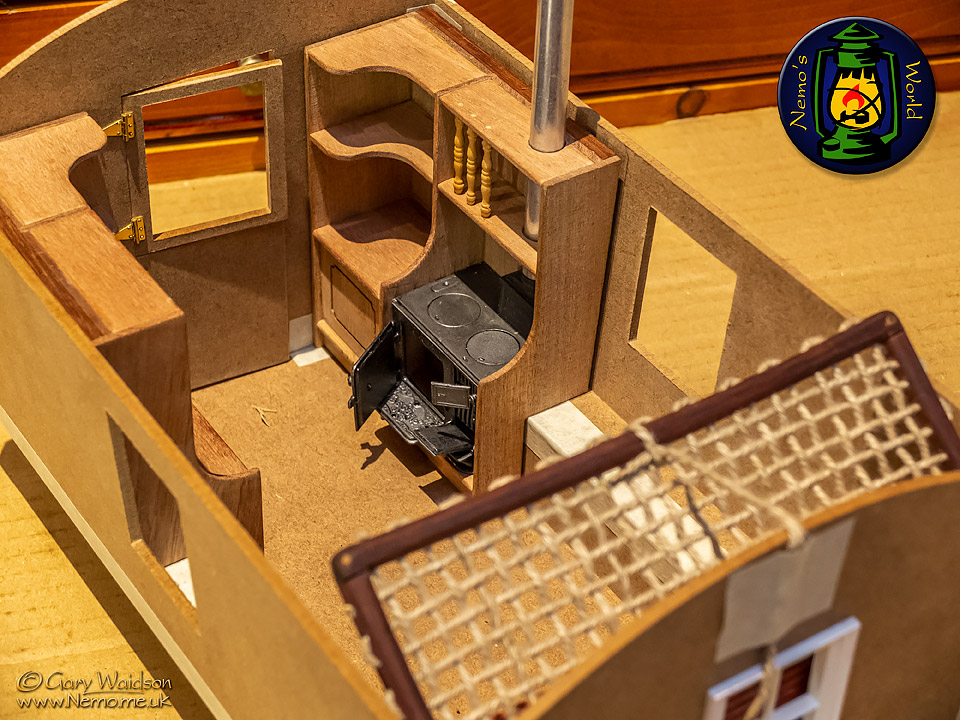
I'm not aiming for a traditional caravan layout for this. I thought I would make it the way I would set out the interior. A sort of eccentric man cave on wheels.
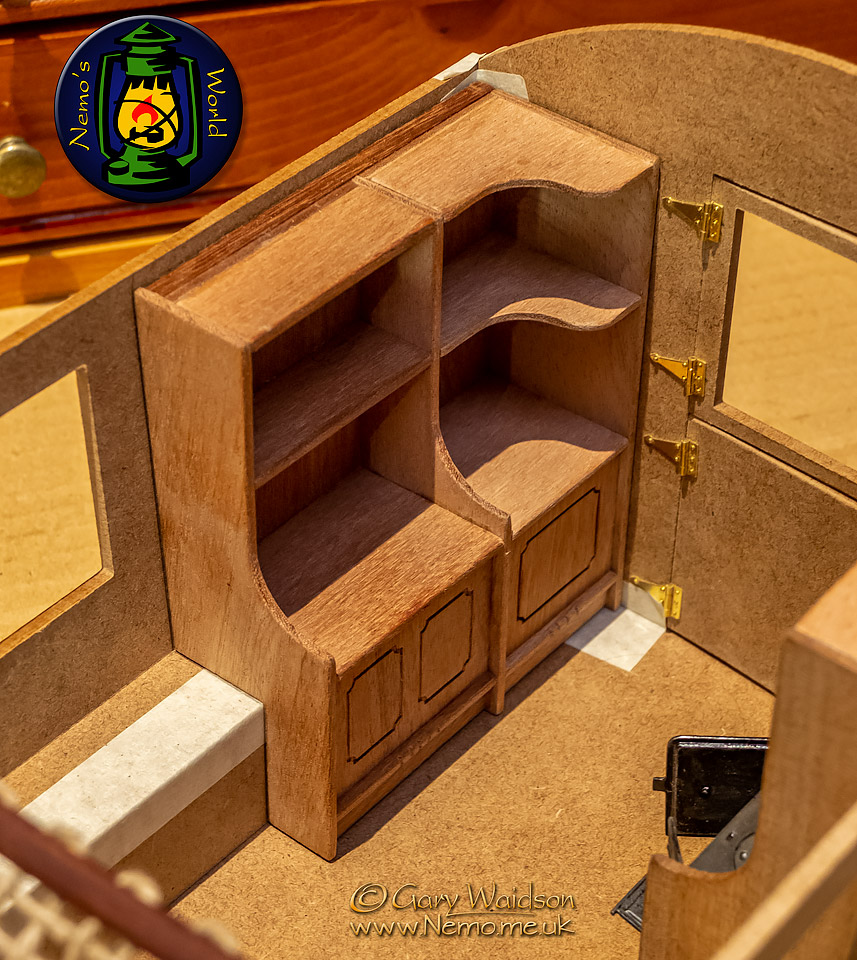
The supplied furnishings for the doorway end seemed practical enough but the other end was completely taken over by the bed closet.
I wanted something more like an gentleman adventurers study with a writing desk and all..
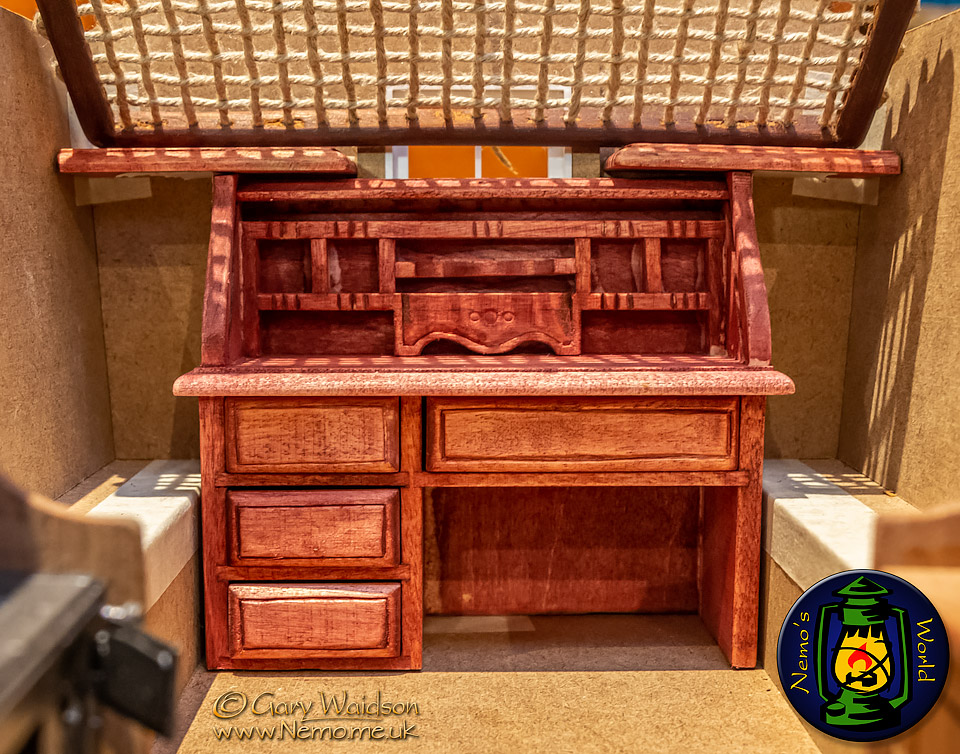
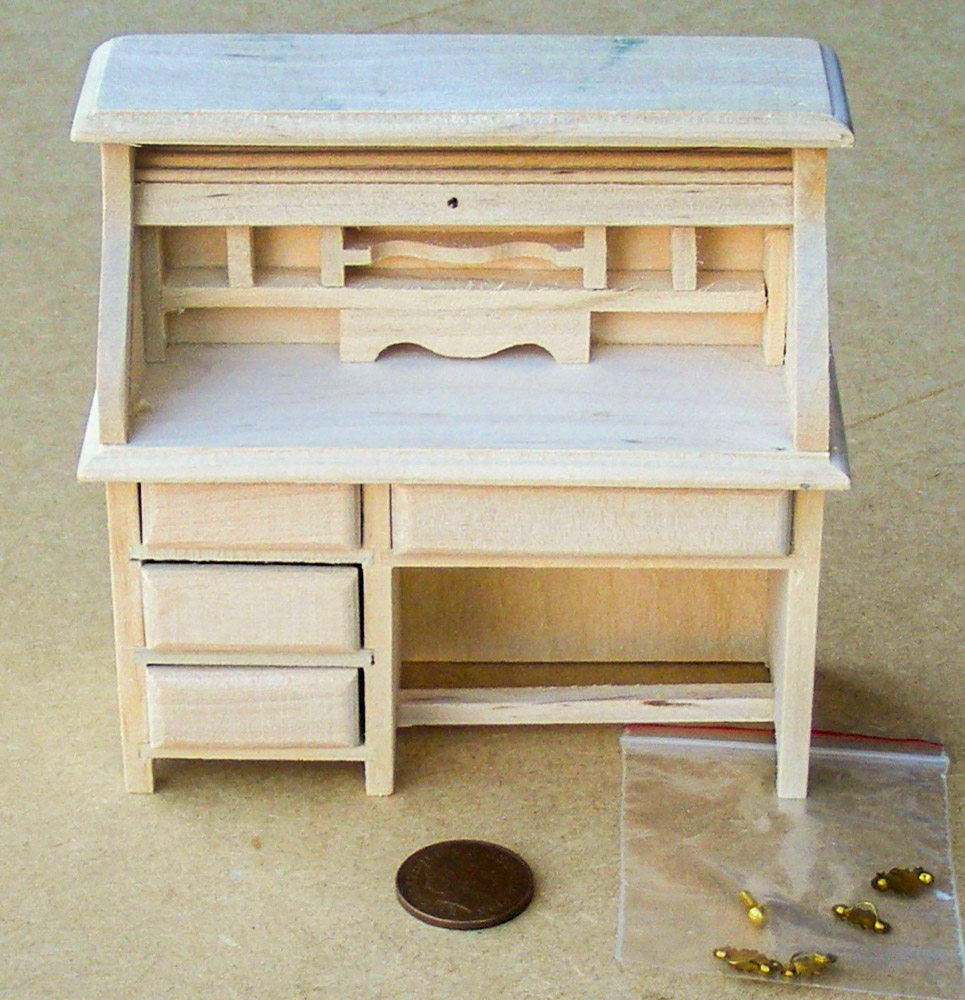
I found this on eBay, which looked adaptable enough and when it arrived I set to work on it.
A little off the height so it didn't obscure too much of the window, some simple carving and it fits with just enough room for a rope framed bed to sling over the top of it.
The mahogany stain came out a bit luminous so I'll have to try and tone that down later.
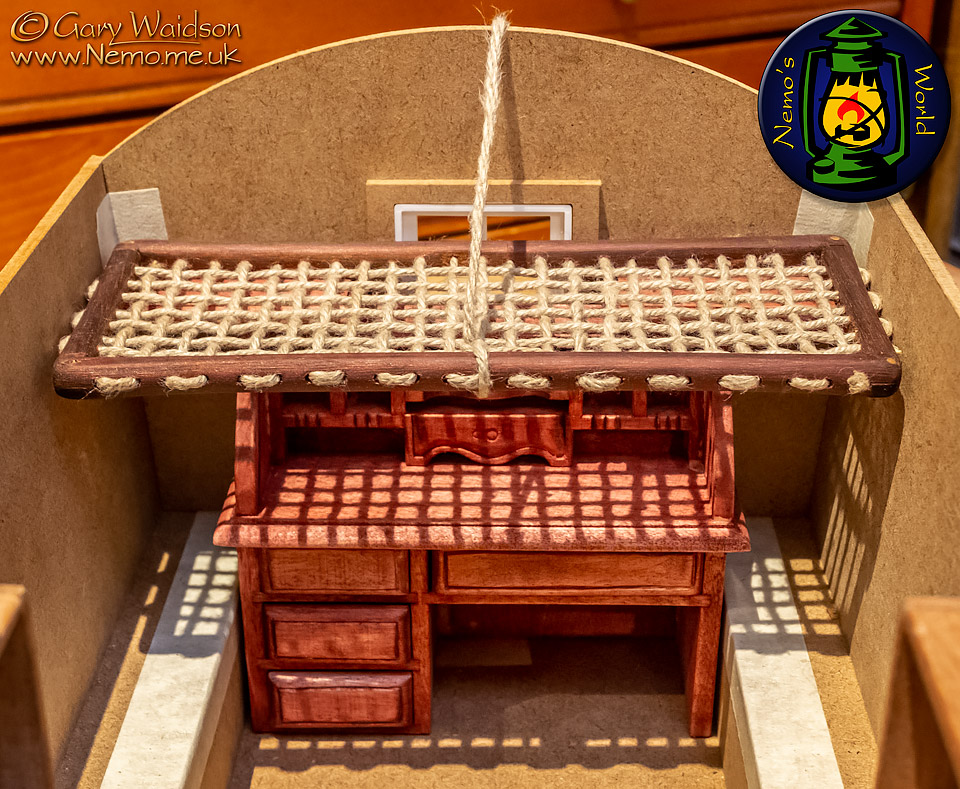
This is the rope bed in a sleeping position. I'll work out the fine detail of hanging it later.
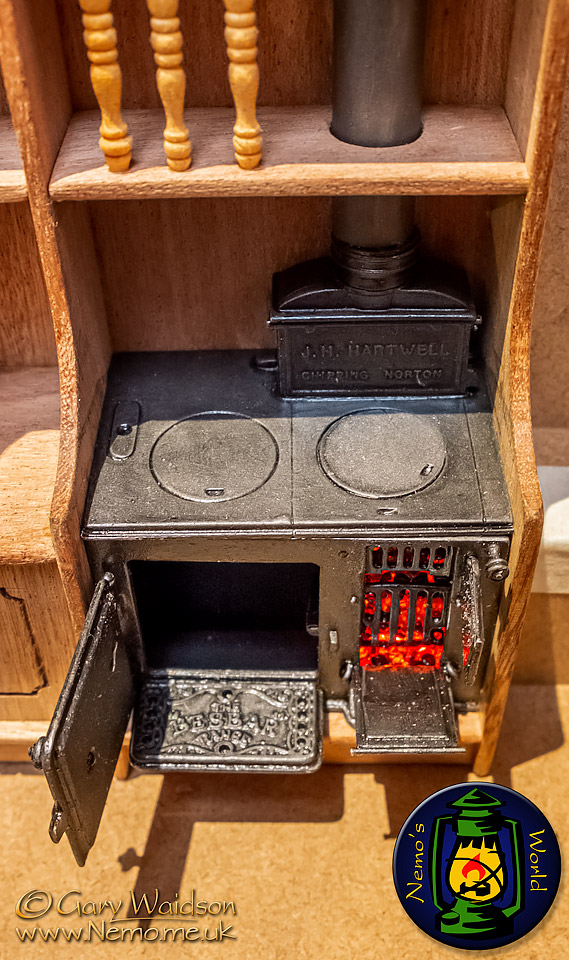
Modifying the stove doors so that they were on proper hinges was not just an exercise in seeing what could be done, I wanted to build an illuminated "fire" in the grate to add a bit of interest in that area.
To built it, I've used a mixture of red, orange and black seed beads imbedded in clear hot melt adhesive for the coals and they are illuminated by three flickering LEDs, red, yellow and orange. The differing positions and colours create subtle shifting light and tone through the translucent beads, creating a quite realistic effect I feel.
The reflective beads also gleam a little when not illuminated so two birds with one stone as it were.
.
12th January MMXX
Today I have mainly been butchering Xmas decorations.
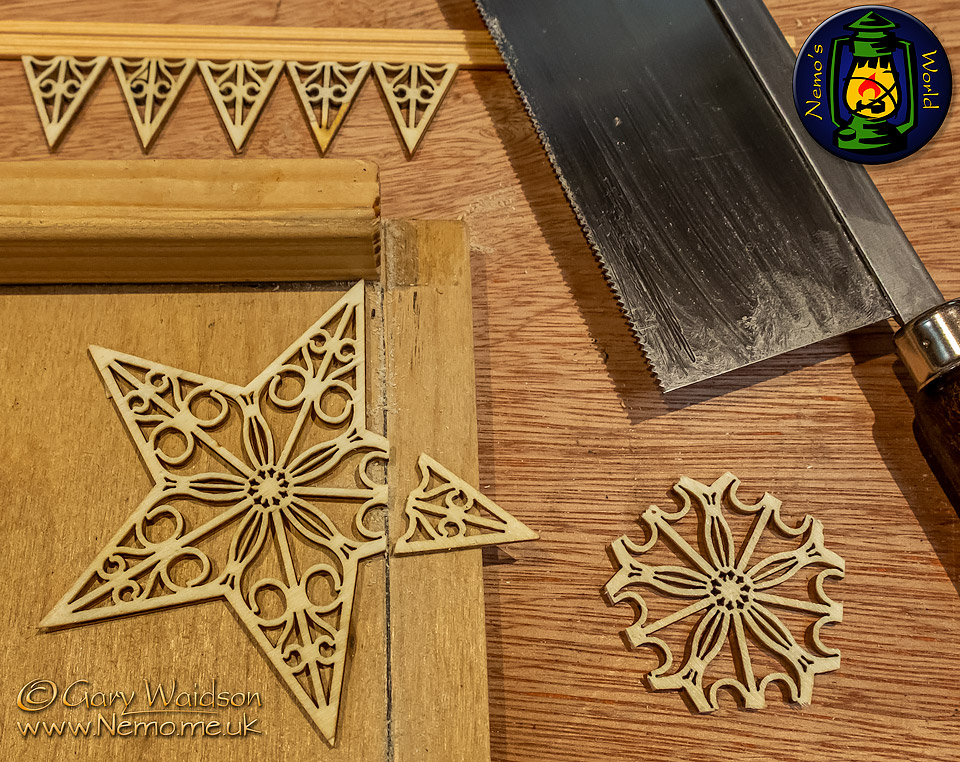
Laser cut plywood stars which I thought would provide some nice "carved" elements for decorating the sides.
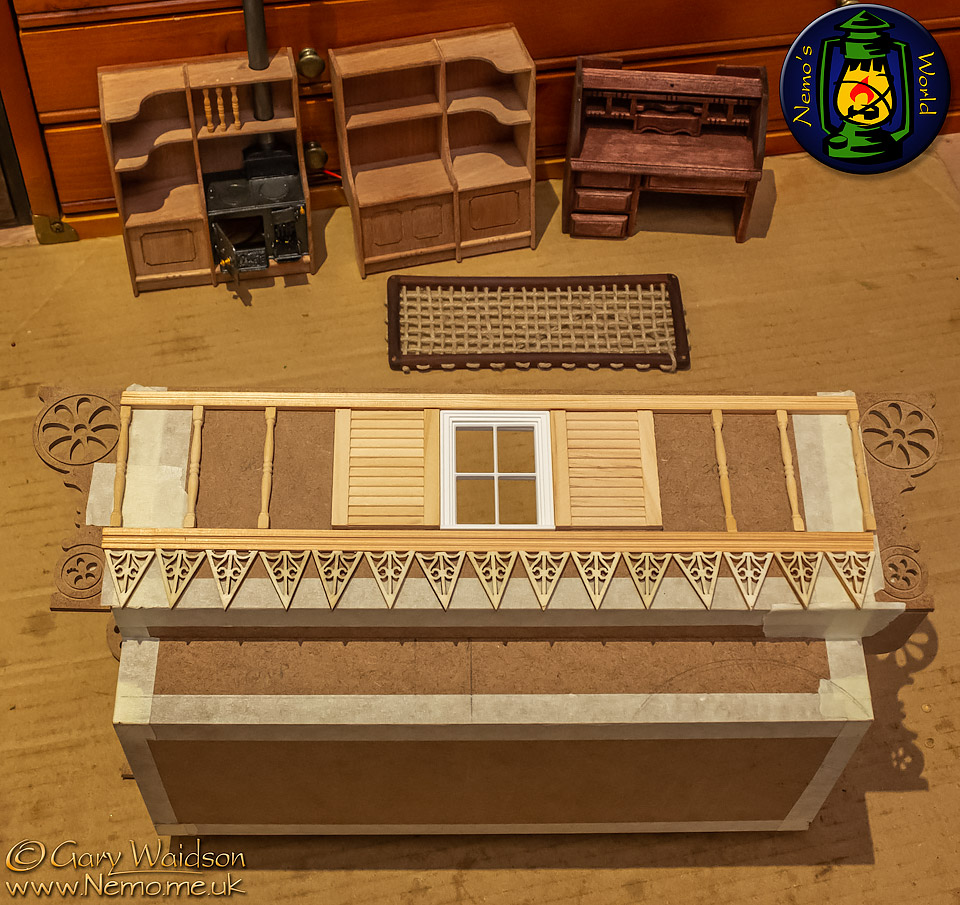
You can see them placed in position under the window boards here. When painted up they should work well.
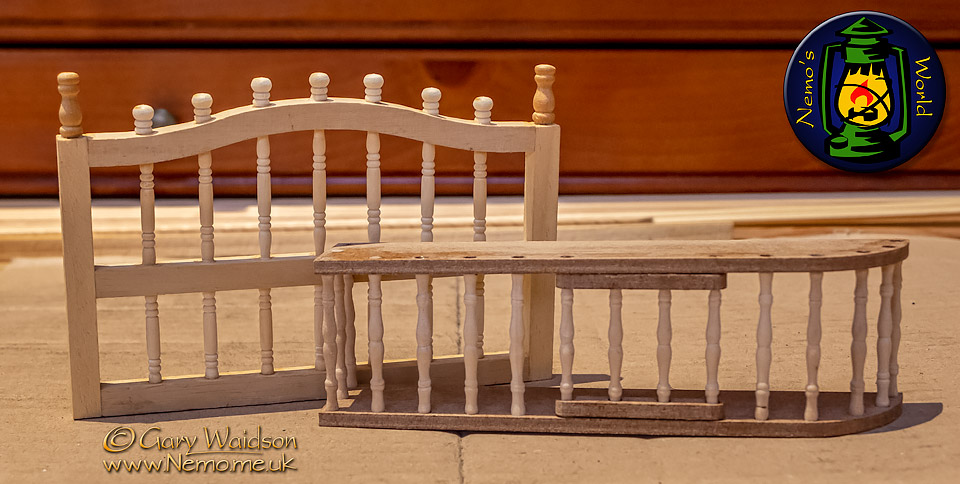
Today I took a look at some of the external fixtures, on the left is the cratch which slings at the back and one of the chicken coups, which mounts under the ledge above the wheel near the front. ( I'll be replacing the coup on the other side with a chuck box type affair. )
The kits for these fittings come with simple dowels for construction but I've replaced them with turned spindles because almost every piece of wood on the original caravans was carved, painted or turned.
I'm currently working out of the recommended order of construction because I want to improve details like this and have them ready when I start the main build.
18th January MMXX
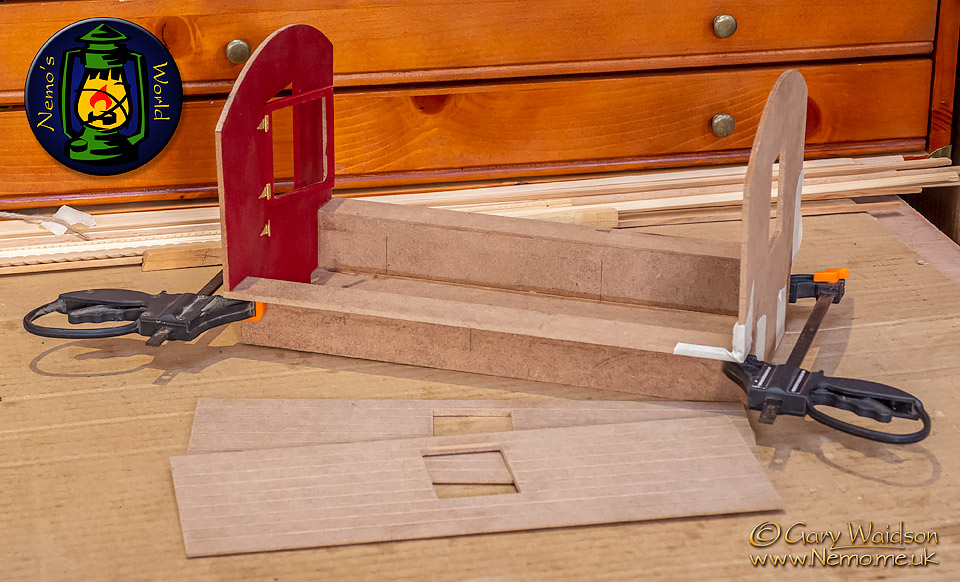
And so the real build begins.
I bought a few of these little trigger clamps years ago and I've lost count of the number of times they have proved really useful. I'm using them here with a bit of masking tape as well to keep the joints nice and tight while the glue dries.
You can also see the first hint at the internal colour scheme in this shot. I painted the end wall before construction because it was easier to avoid the hinges that way. You can also see that I’ve carved grooves into the walls to simulate planking.
Here's the main body built and given their first base coats of paint.
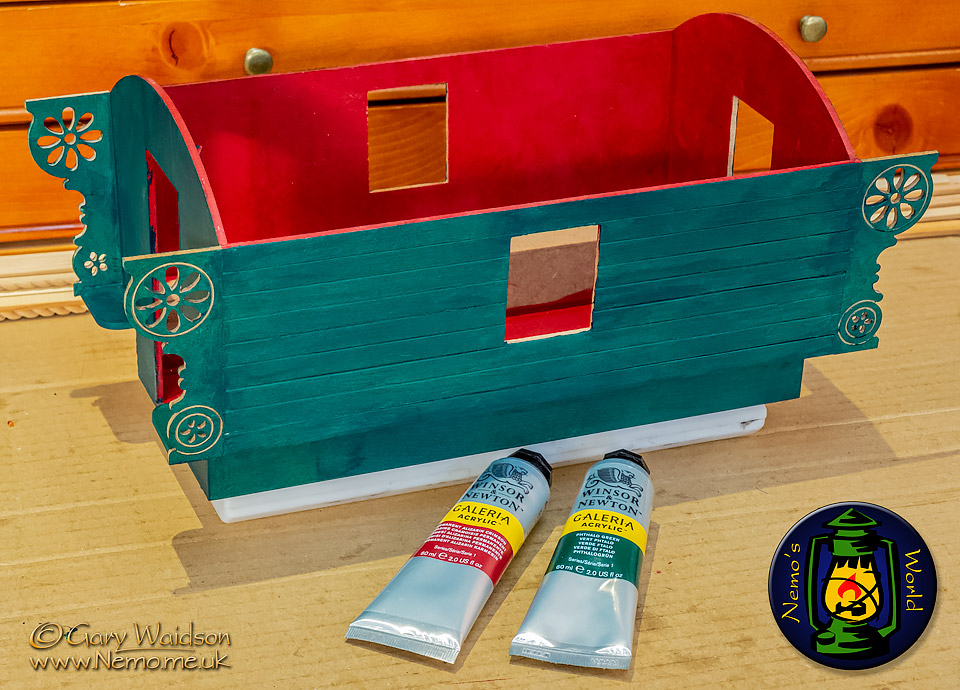
This gives you a pretty good idea of the basic colour scheme with most of the undercarriage and detailing in Deep Hue Cadmium Yellow.
I've decided I'm just going to wax the wooden furnishings.
19th January MMXX
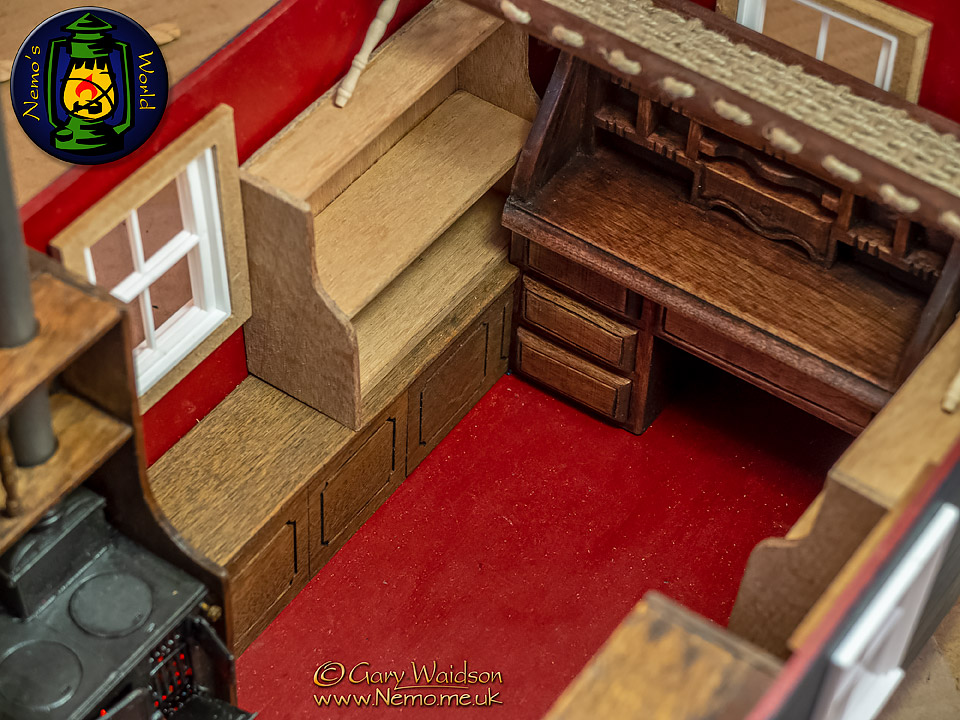
A bit more furniture for the Vardo.
First of all finishing the bench panelling. The original kit came with two side benches but only enough panelling to reach the bed cabinet. However, the bed cabinet also had panelling that was a close match to the bench panels so I butchered them to extend the side panels.
The corners by the desk had been nagging me a bit. Dead areas that couldn't be easily accessed or seen.
I wanted more shelving for stuff and I realised that if I made the shelving units free standing, I could slide them in and out of the corners. It would also provide the support for the rope bed in the sleeping position.
The glue is still curing so I haven't waxed them in this picture but you can see them here in the out position.
21st January MMXX
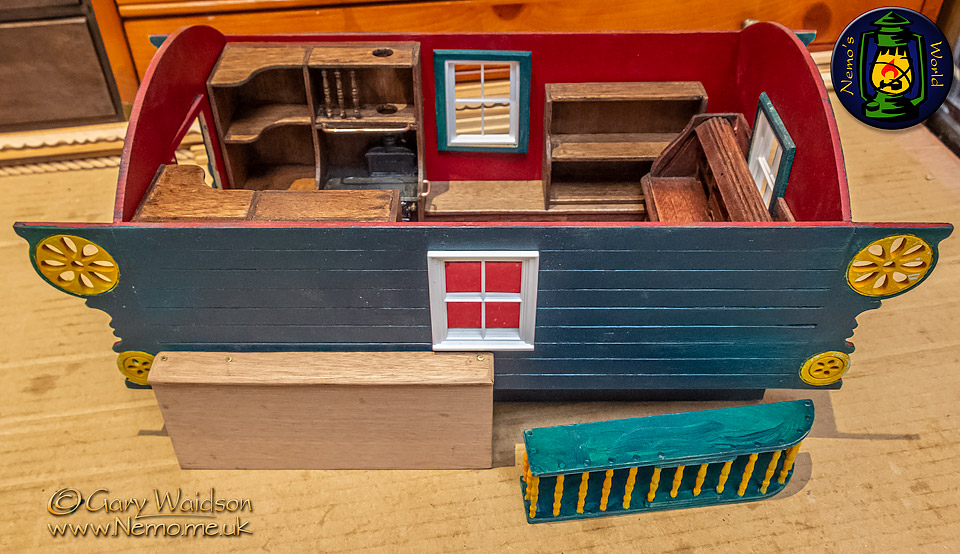
I mentioned that the original kit came with two chicken coups but I was only using one, which will be mounted on the side of the Vardo facing away.
Well, this is what I wanted the space for on this side.
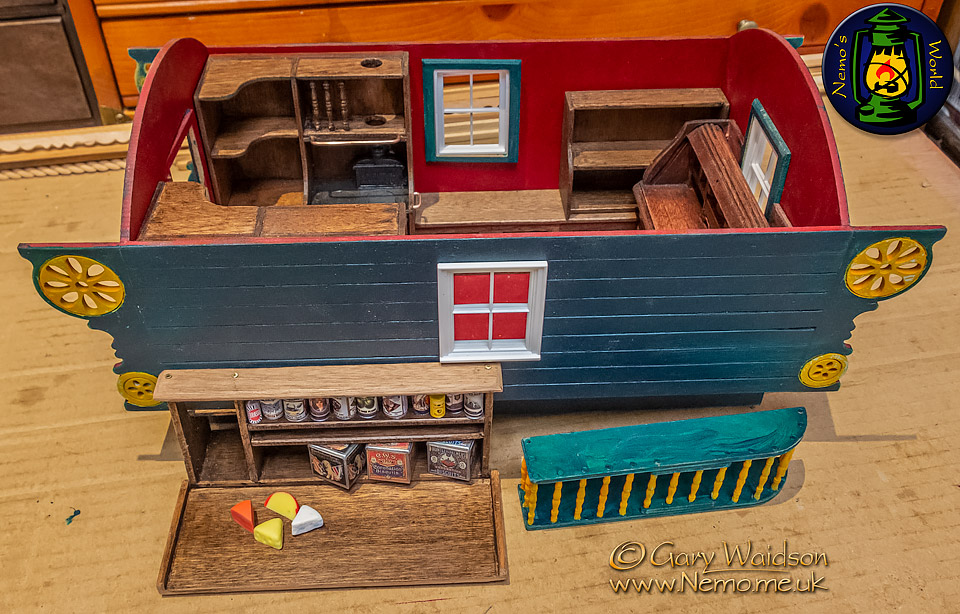
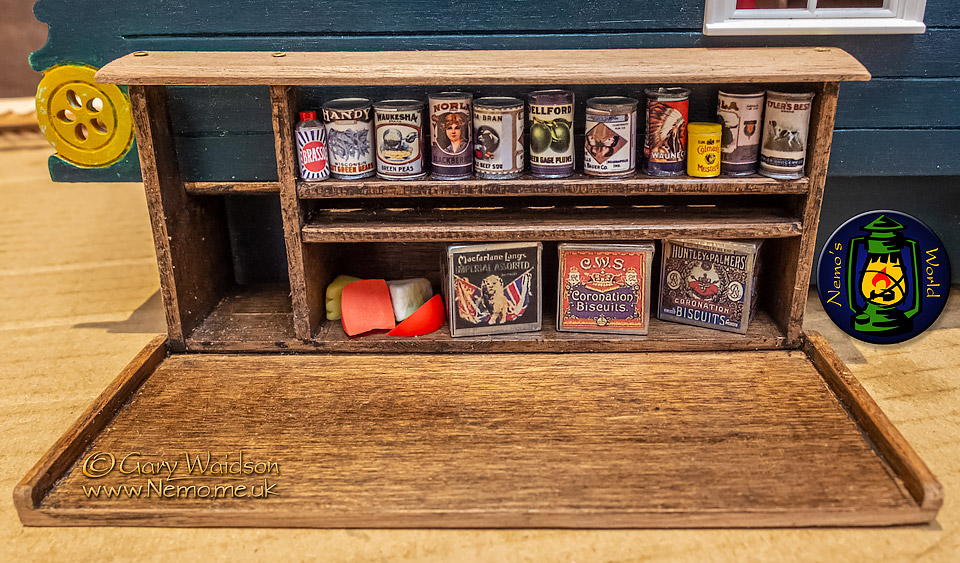
Riam is definitely getting the credit for this idea. A wagon mounted chuck box with fold out table based upon the one he has on his own Living Van.
Another scratch build using re-cycled mahogany. I'll paint the outside to blend in with the van but I've waxed up the inside as you can see.
If you compare the two pictures you can also see how the desk side shelving slides into the corner for transit.
The space on the left will be a game larder, I wanted it long enough to hang a pheasant or some conies and I will make a couple of drawers for the narrow shelf which extends under the ledge
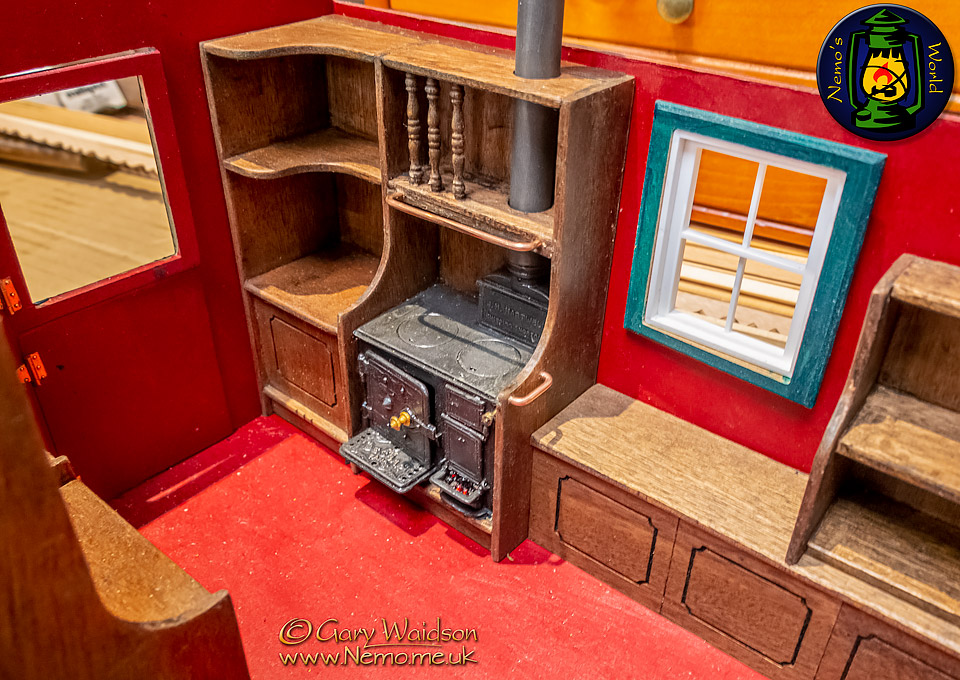
I also used a scrap of copper electrical wire to make a couple of rails near the stove. One for cups and utensils and the other for a cloth or towel of some kind.
23rd January MMXX
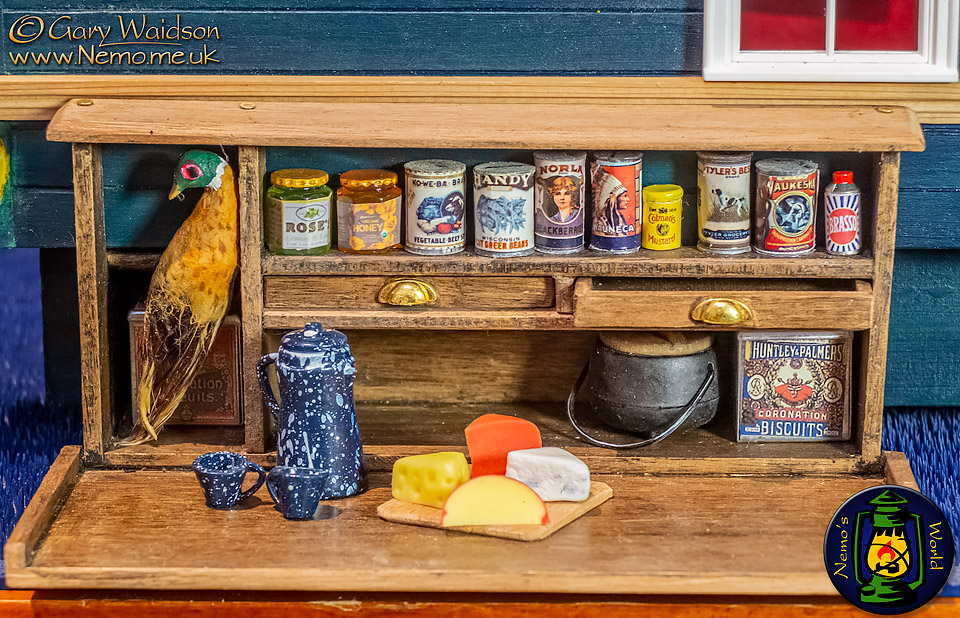
An updated picture now that I have fitted the drawers and the game bird has arrived.
24th January MMXX

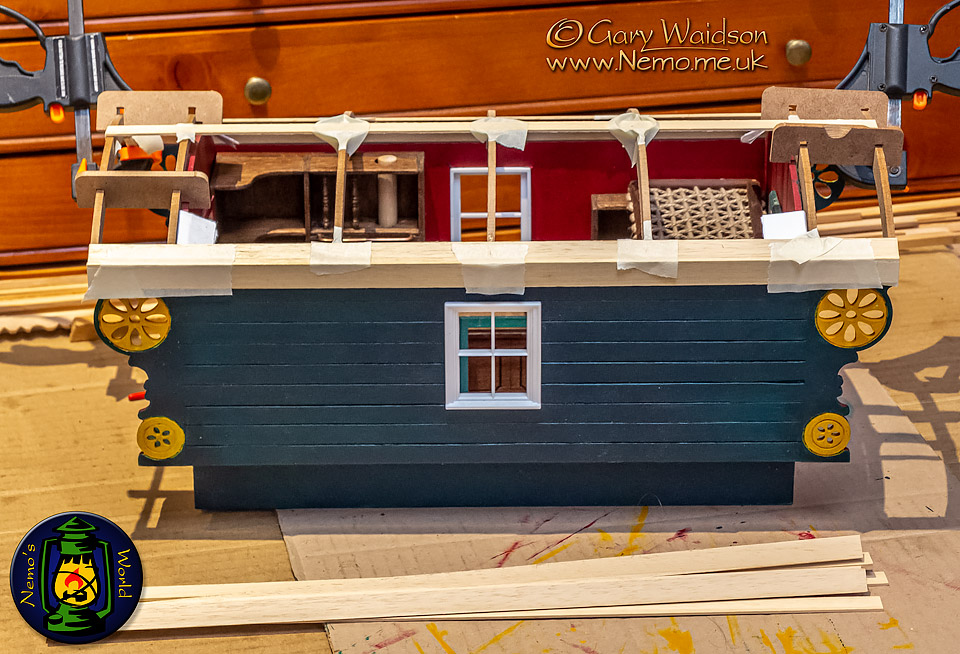
Here we go, one of the more complex jobs, the construction of the roof.
The instructions are fairly straight forward and there are bits supplied to help you with the spacing but what the instructions do not suggest is that this is a lot easier with a roll of masking tape to hold bits together while they glue.
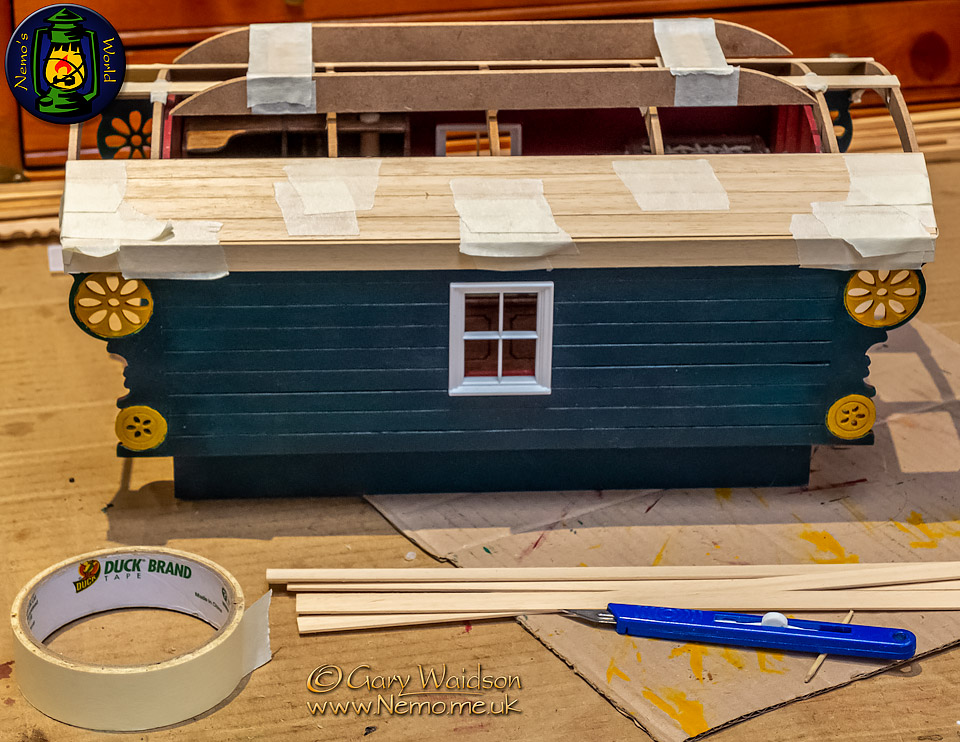
Again, I am modifying things a bit. The kit comes with a vent for the roof but the instructions just show it being added to the top instead of being a functional “mollicroft” which often had windows for extra light. You can see the position of the non functional vent in this picture.
To do this properly, the roof needed to be put together a bit differently. First of all, it will need better structural integrity so instead of just spot gluing the planks to the ribs they are also glued along the edges to the adjacent planks.
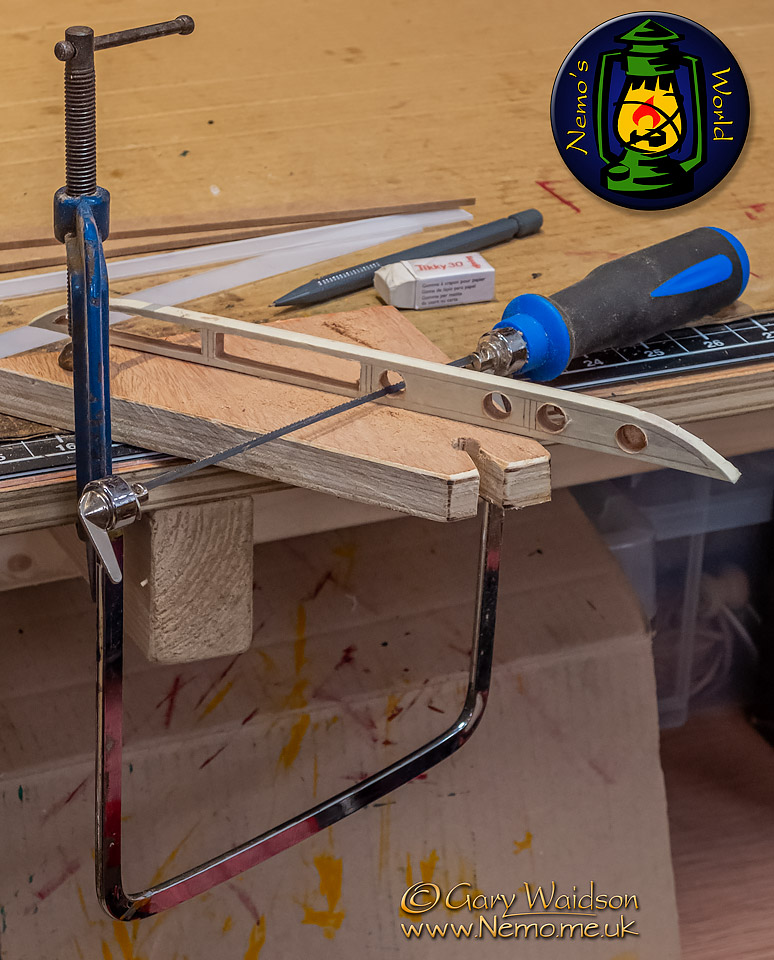
To make the windows I taped together four strips of wood and set to with a coping saw.
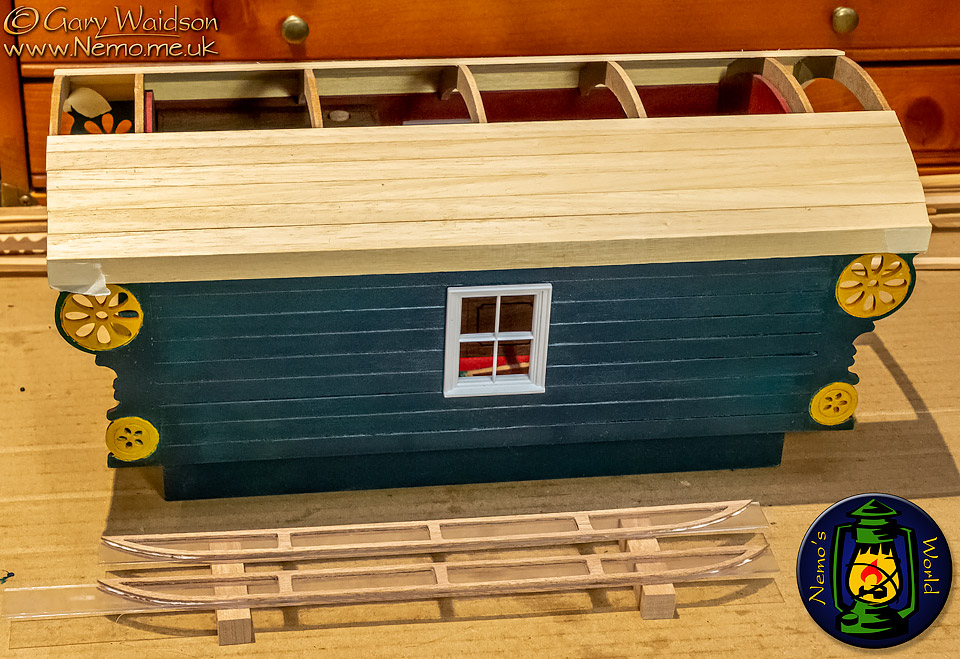
These pierced strips were then glued to a glazing strip and the whole composite will be shaped to match and replace the original vent walls.
25th January MMXX
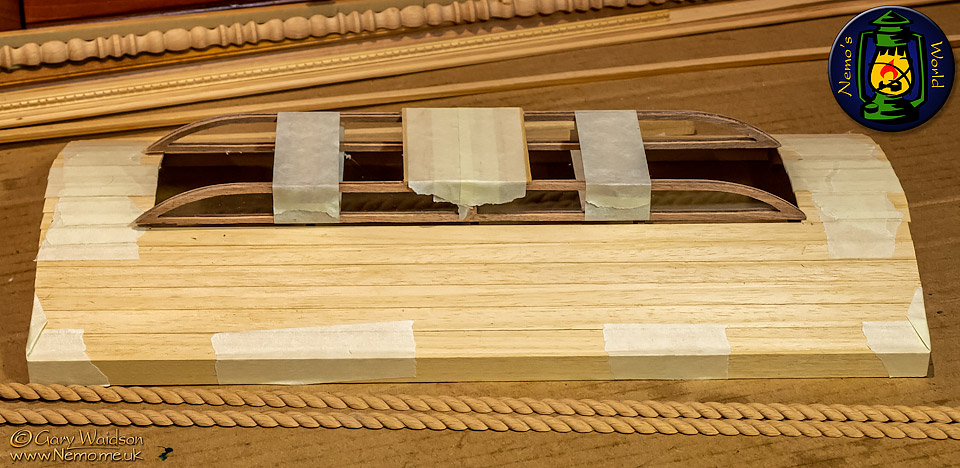
The roof a little further on and the completed mollycroft windows in the position they will end up in.
I’m just starting to plank the top section here.
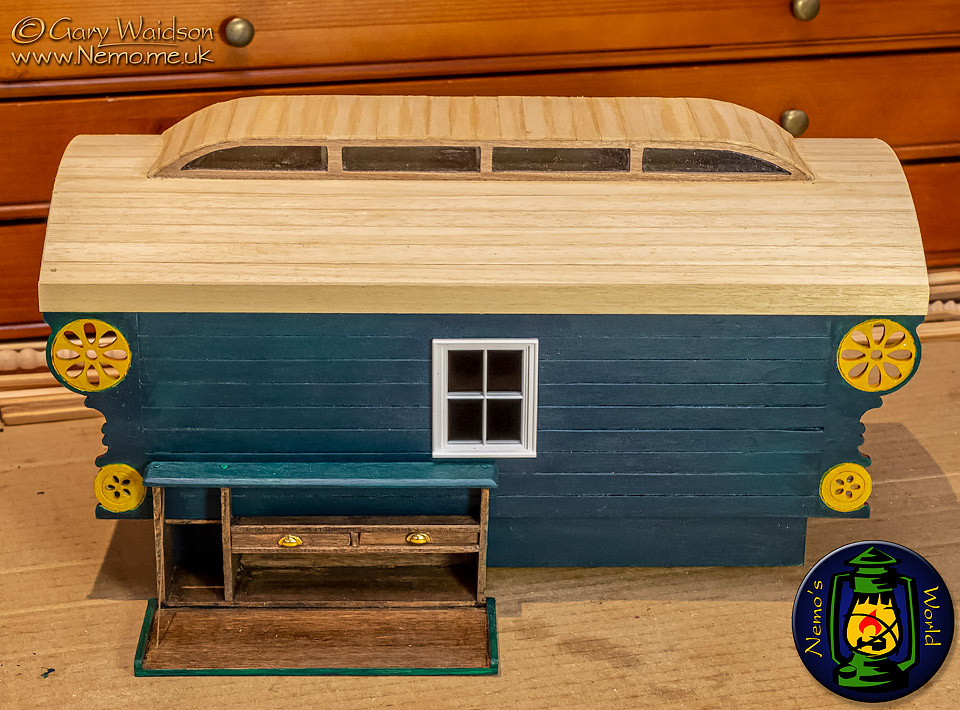
This is the completed roof and mollicroft.
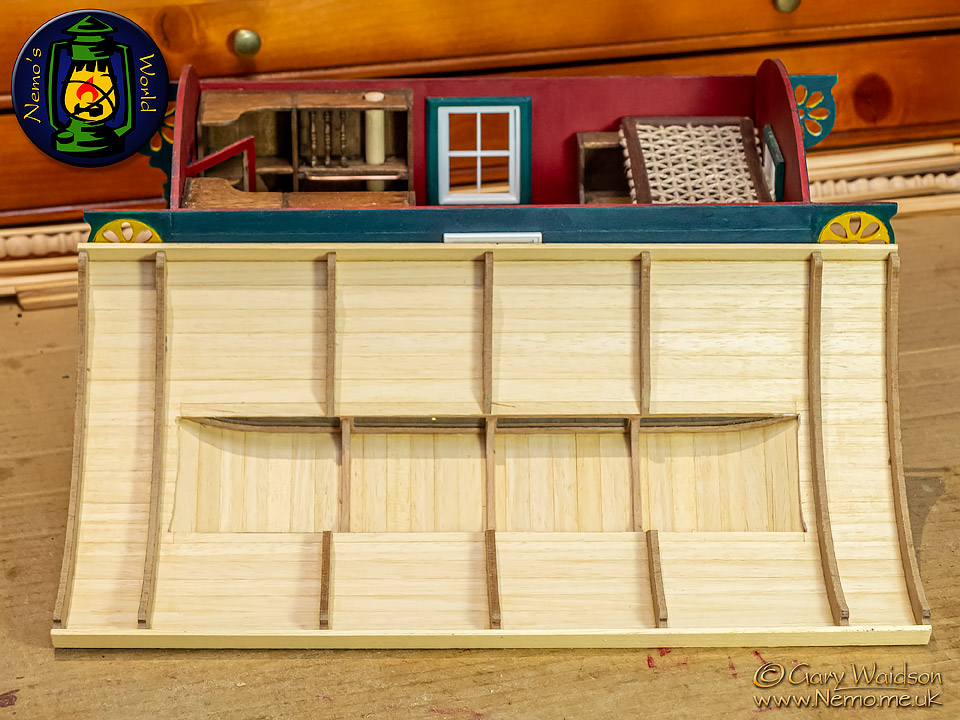
And the roof turned over so you can see the construction inside.
If I had planned it a bit better I would have set the roof braces in a position that would line up with the mollicroft braces but that’s too late for me now.
26th January MMXX
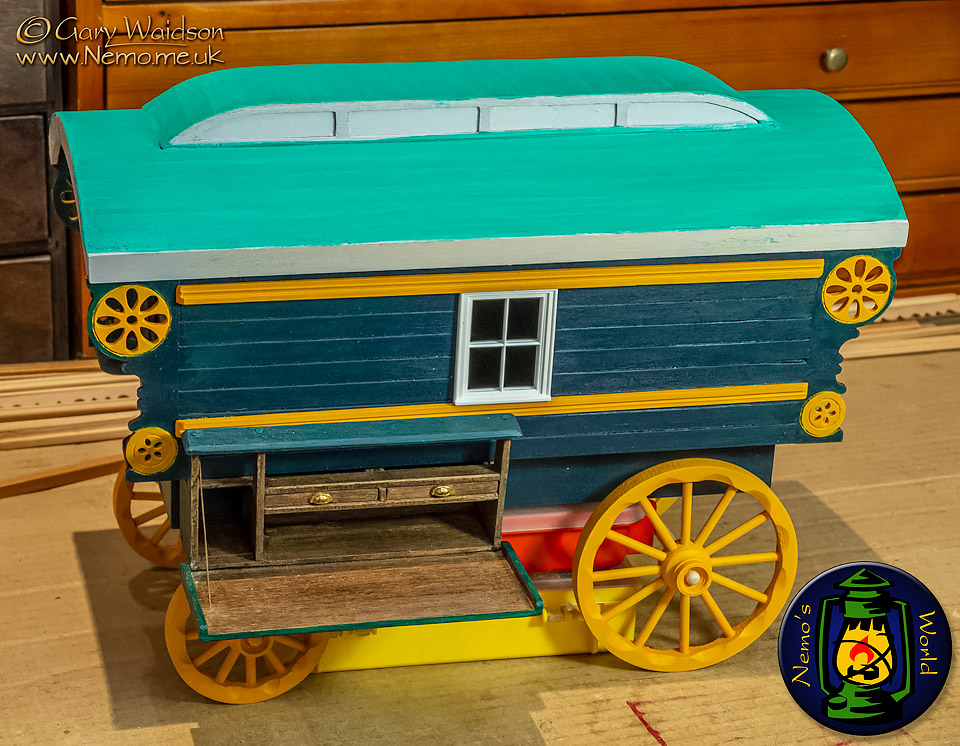
A good number of pictures and illustrations of traditional Vardos show them with mint green roofs, presumably roofing felt of some kind.
I’m aiming for something along the same lines although it will be darker than this base coat.
You can also see the window boards have been fitted now, the first parts of the applied decoration for the outside on the van. I’ve masked the mollicroft windows for painting.
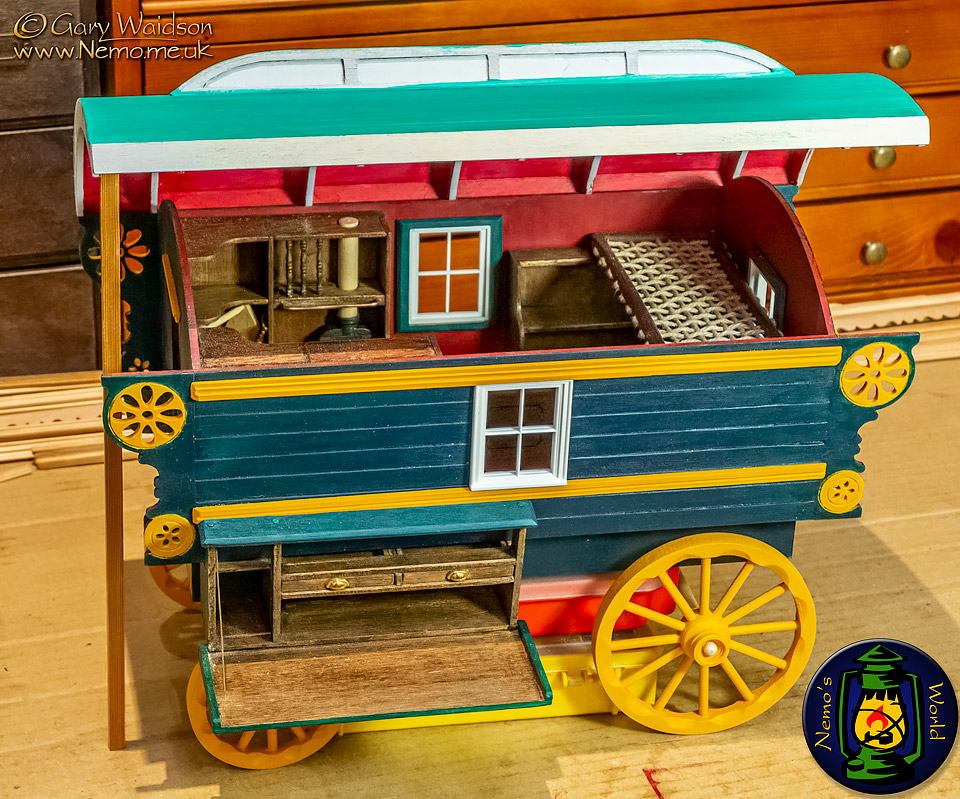
When displayed, it will have the roof propped open, more or less as you see it here. I’m putting some thought into the idea of adding a mirror somewhere so the near side interior can be viewed as well.
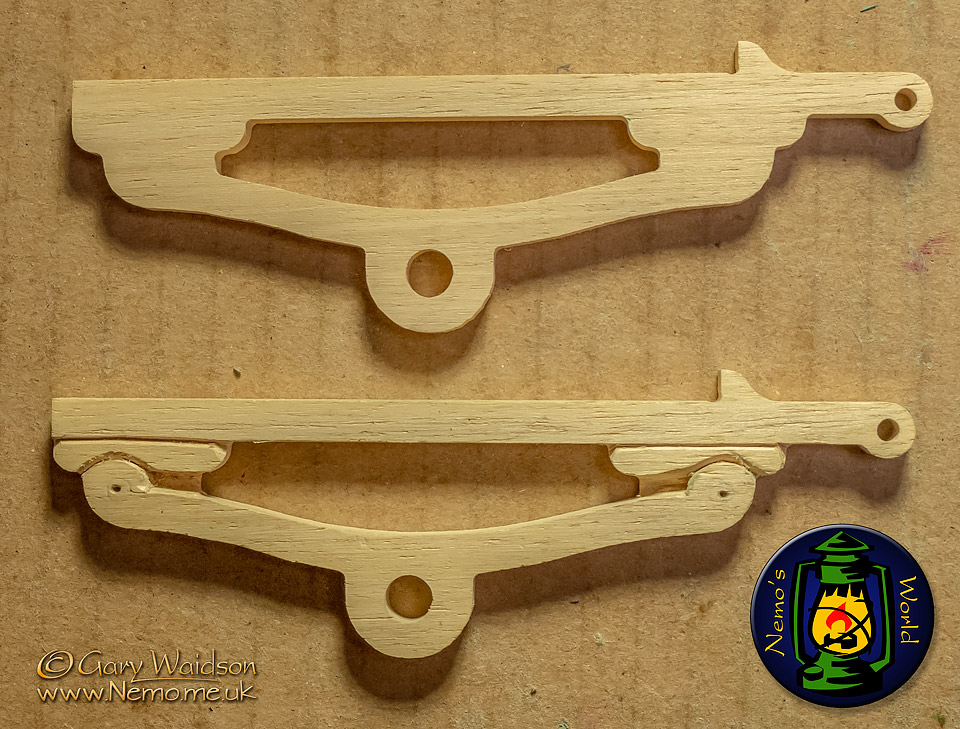
Turning my attention to the under carriage, I looked at the axle mountings first. These are made to simulate the leaf spring suspension but as simple cut outs they looked a bit crude.
In fairness, they live behind the wheels and are not easy to see but they are visible so for the sake of a few minutes carving with a craft knife, putting a little more detail into them is worth the effort.
29th January MMXX
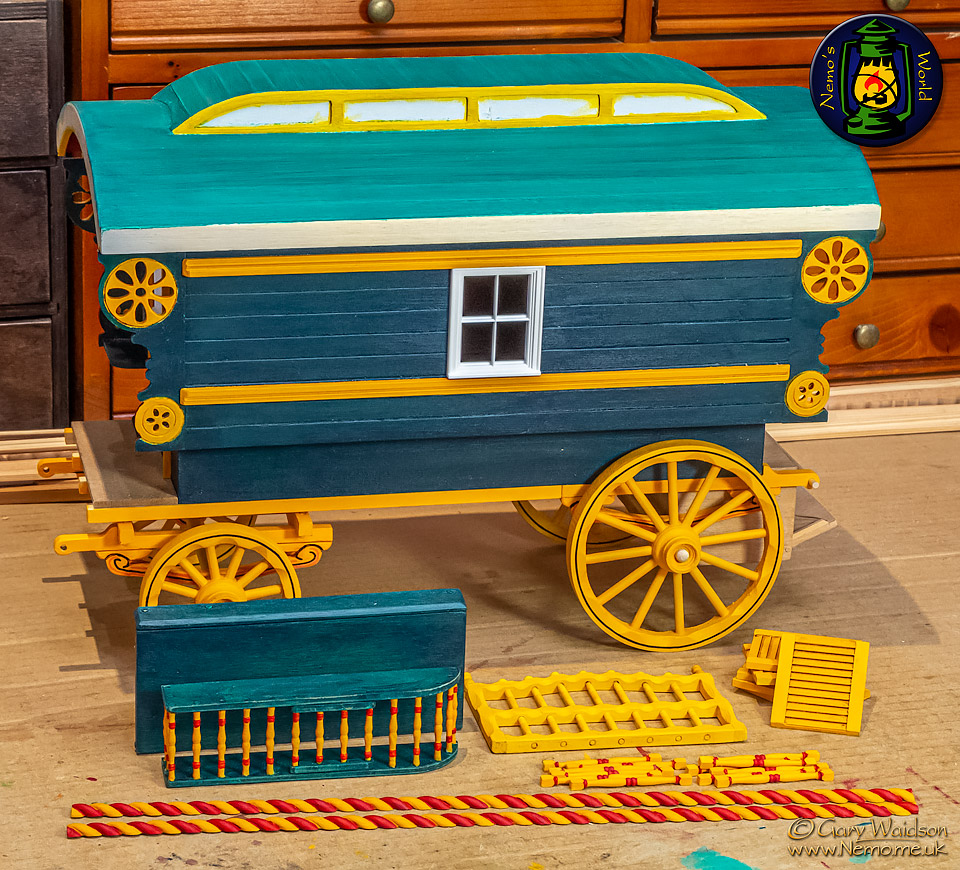
Small steps today, really small steps.
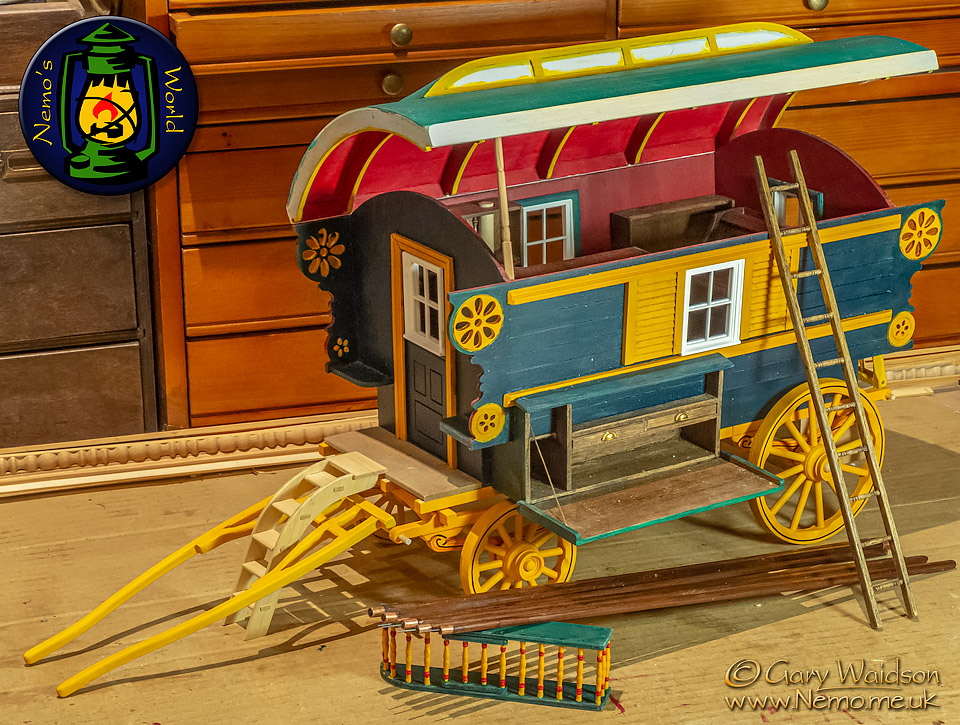
The steps that lead into the caravan come as part of the kit. I'll work on them a bit to make more of them.
Something that came almost as standard with the original Vardos was a narrow ladder which slides under the van bed between the summer bars. Mine was made from the redundant window bars which I replaced and some more turned spindles.
Other than that, I've made some poles for the awning and I've attached the chuck box to the van body. ( Still got to do the chicken coup. )
I've also shaped up the shaft and given it a lick of paint ready for a few modifications.
It's on it’s wheels now.
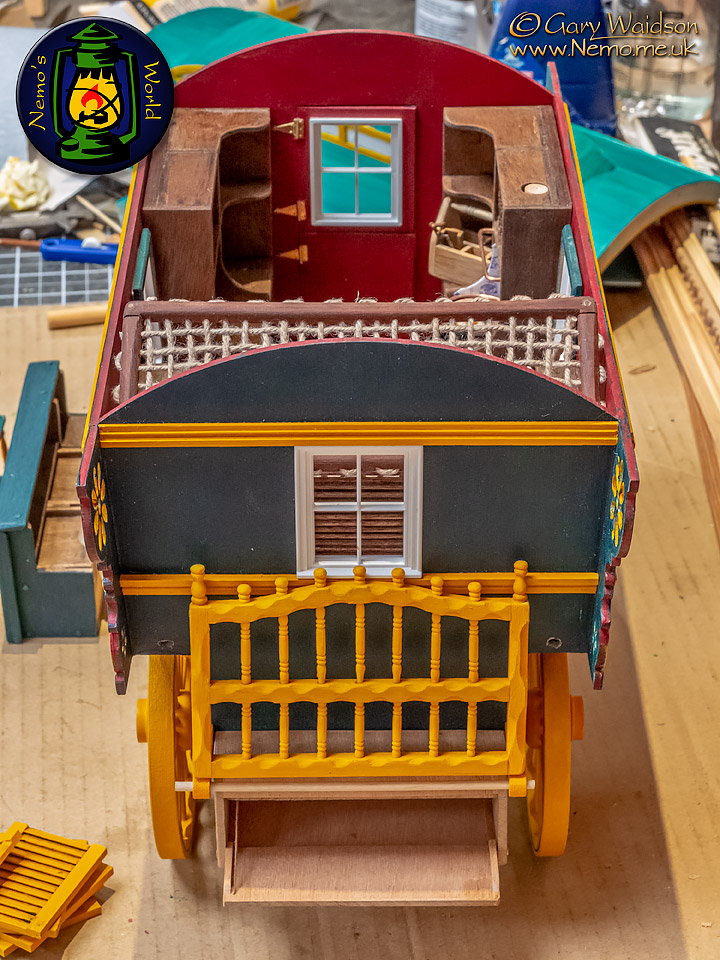
You might also notice the pan box behind he rear axle. This is another storage area with a drop front for display. What will not be on display is the power distribution board for the lighting that sits in the top of the box.
The cratch has had it's first coat of paint and the decoration for the roof edge has had it's last. The spindles are almost ready to go between the window bars and the shutters are in the process of being weathered.
Another view showing the back box in more detail.
You can also just see the wiring holes for the rear carriage lights.
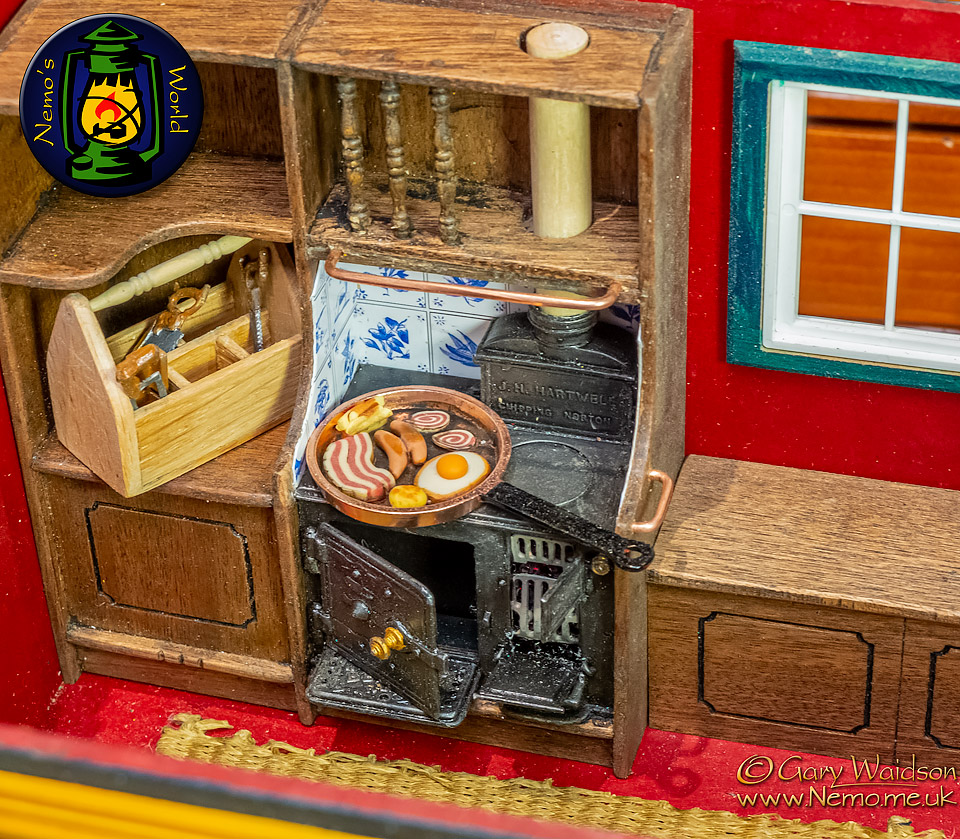
Inside, I've tiled around the back of the stove, built a tool box which needs more tools, Debs wove me a rush mat and someone appears to be having a fry up.
30th January MMXX
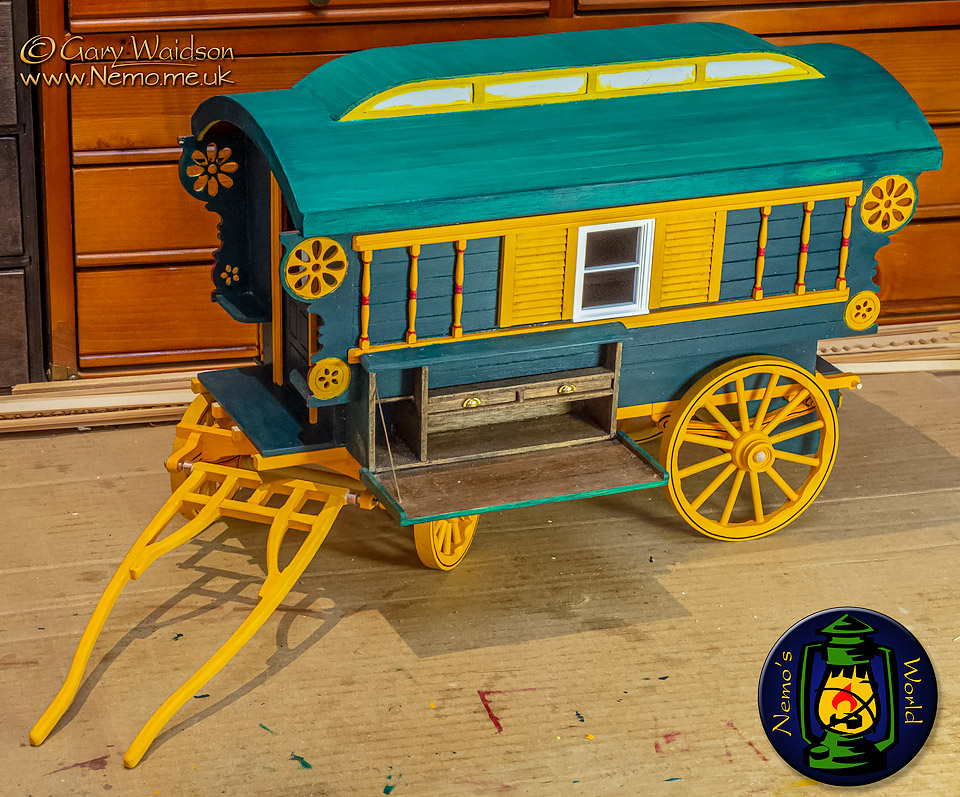
Sometimes it is the smallest of details that moves a model closer to reality.
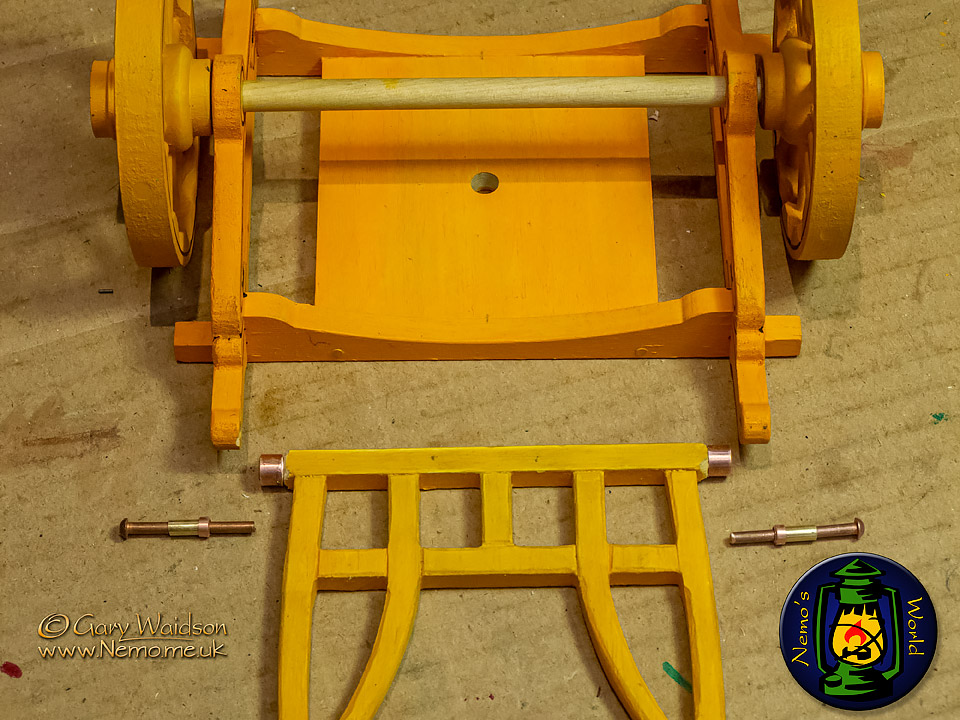
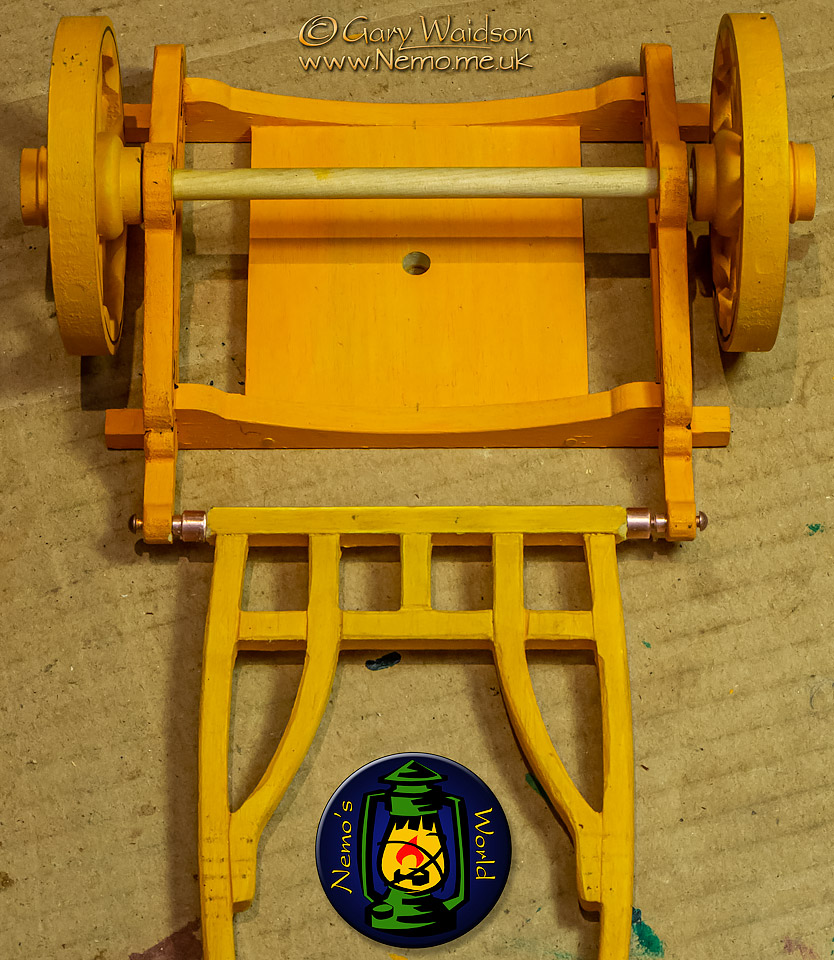
The kit came with a simple and practical method for mounting the shaft which mimicked some of the original Vardos but looked a bit “modelish”, if you know what I mean.
As I looked for a better looking solution, I realised that it would not be that difficult to do it properly by building a simple bearing using scraps of piping from my scrap store.
There was usually a reason things were done certain ways and this is a good example.
The resulting pivot will be stronger than the kit method while still allowing the shaft to be easily removed for any reason in the future.
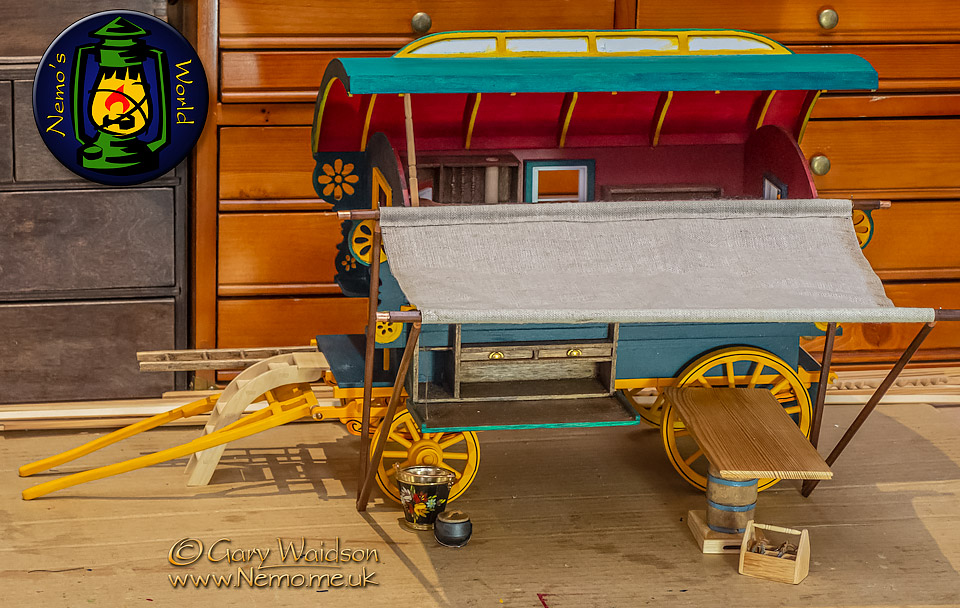
So, we have the shaft in place now and also the spindles between the window bars.
My intention is to set this out as a camp scene and for that an awning is a must in my opinion. The roof being open like this is just for display as the originals were obviously fixed.
The table that you see here needs some proper trestles, I’m just standing it on the barrel to check the fit here.
I’ll add a camp fire with chitty irons and cookware at some stage too.
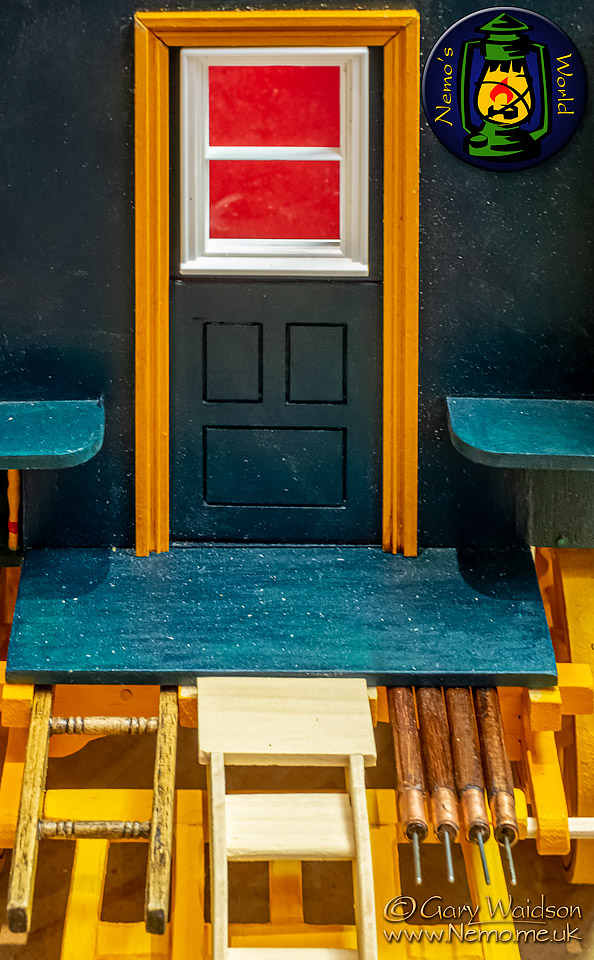
And just a quick shot to show you how the ladder and the awning poles stash away.
1st February MMXX
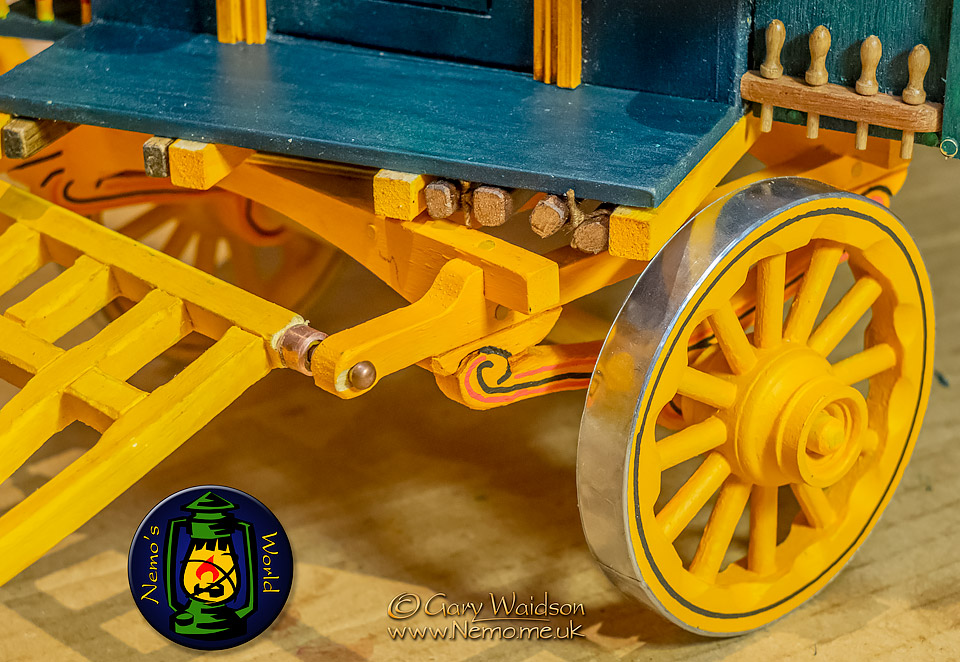
To tyre the wheels, I’ve used strips of self adhesive lead.
I used the same stuff for flashing on Debs dolls house roof which is what gave me the idea. It will dull down in time which should look better.
2nd February MMXX
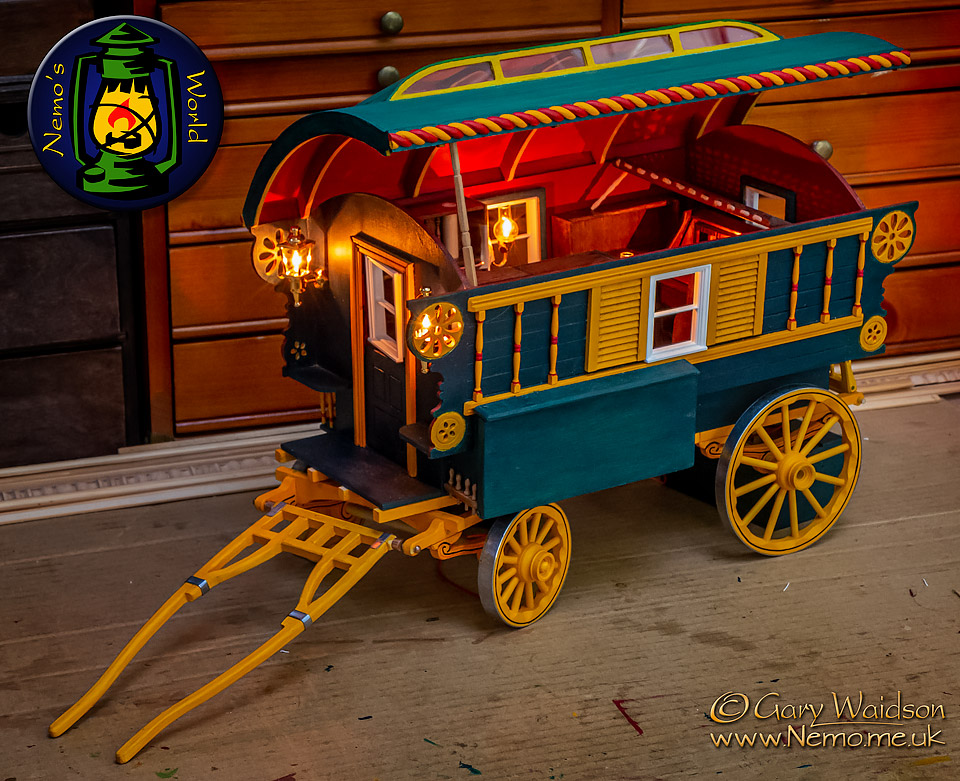
Today, the work I put in to the wiring a while ago, started to pay off.
This is not quite the finished lighting but it gives you a good idea of how it should work.
4th February MMXX
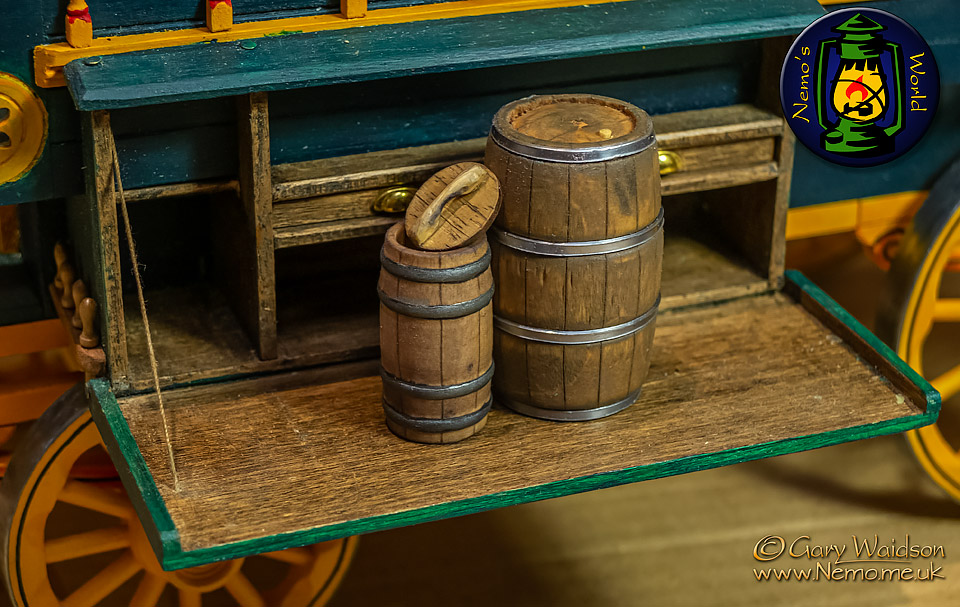
I quite enjoy working on the details. I wanted a couple of barrels for the build and I ordered two from eBay that turned out to be a little uninspiring. One was unfinished with a hole drilled for the inside and had raised bands of wood included in the turning. The other had grooves where the bands were filled with grey vinyl thonging.
Out came the scalpel and off came the vinyl. All the closed ends were flat so I carved in the barrel ends. I then used a technique called “Kolrosing” to mark in the barrel staves and painted the wooden bands on the small barrel.
For the large barrel I used some trimmings of the lead tape that I had used to tyre the wheels with. You might also notice some scraps that I used to add iron work to the cart shaft in the picture above this one. Useful stuff that.
The barrel bung on the top is just a cocktail stick and I shall either make or source a tap for the bottom side at some stage.
Here it is in a little more detail. ( Not the best picture, my compact camera is playing up at the moment )
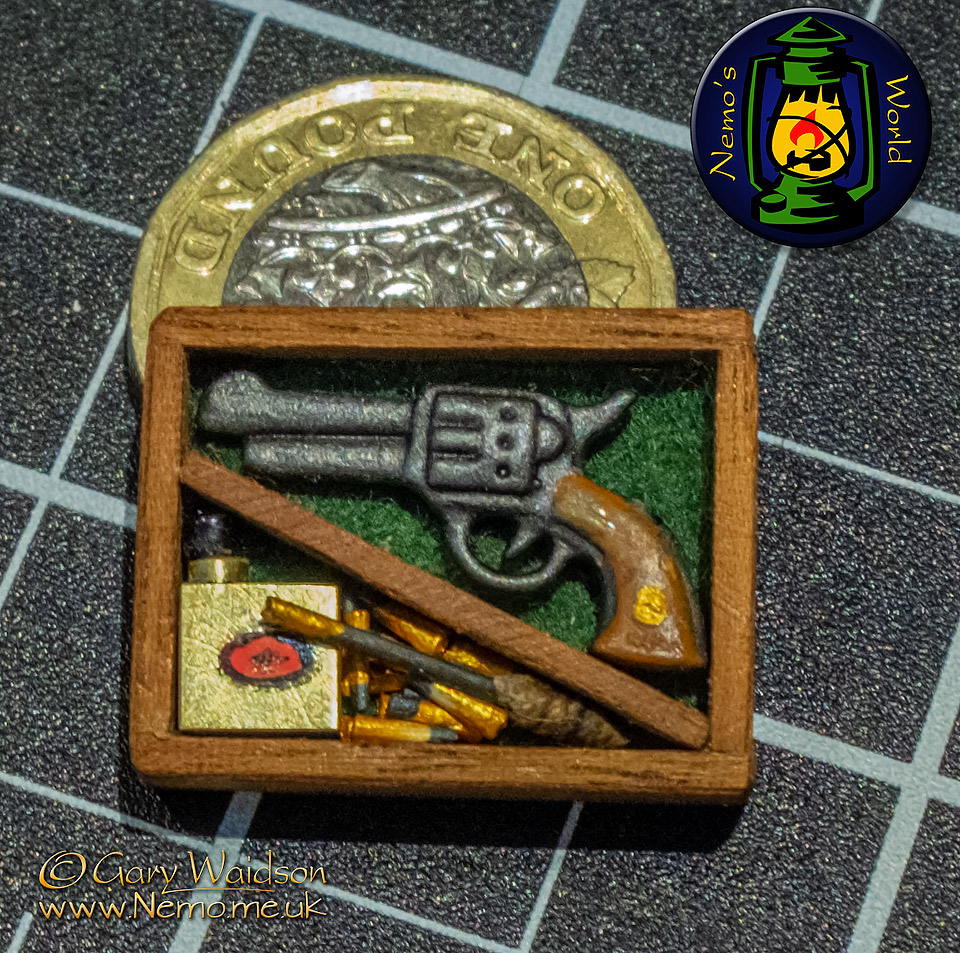
A Victorian gentleman adventurer needed a little fire power to keep the natives in line of course ( I’m joking in case it’s not obvious )
There may be one or two on show here but they do need to be properly cared for, so it’s a nice opportunity to construct some miniature gun boxes with all the necessary accoutrements.
The pistol was bought in but all the rest is scratch built and yes, the stopper does come out of the oil bottle.
15 February MMXX
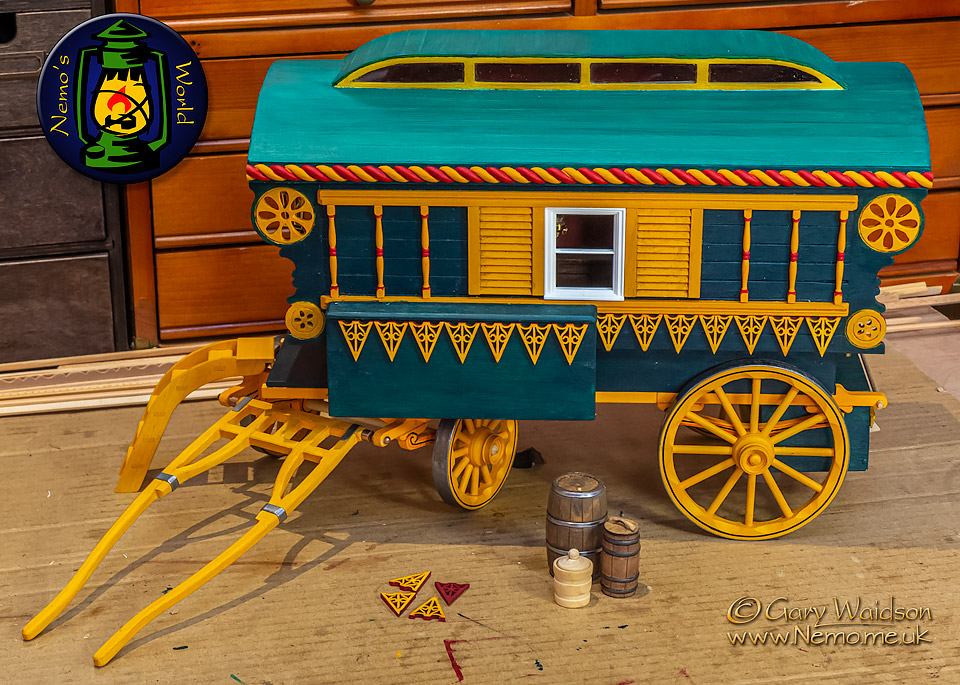
If you have been following this build since the beginning, you might remember me cutting up some Xmas decorations a while back. Well here they are again. Sprayed red to fill the edges and then surface painted with the yellow to match the other trimmings.
This picture also gives you an idea of what the barrels looked like before being tinkered with.
5th February MMXX
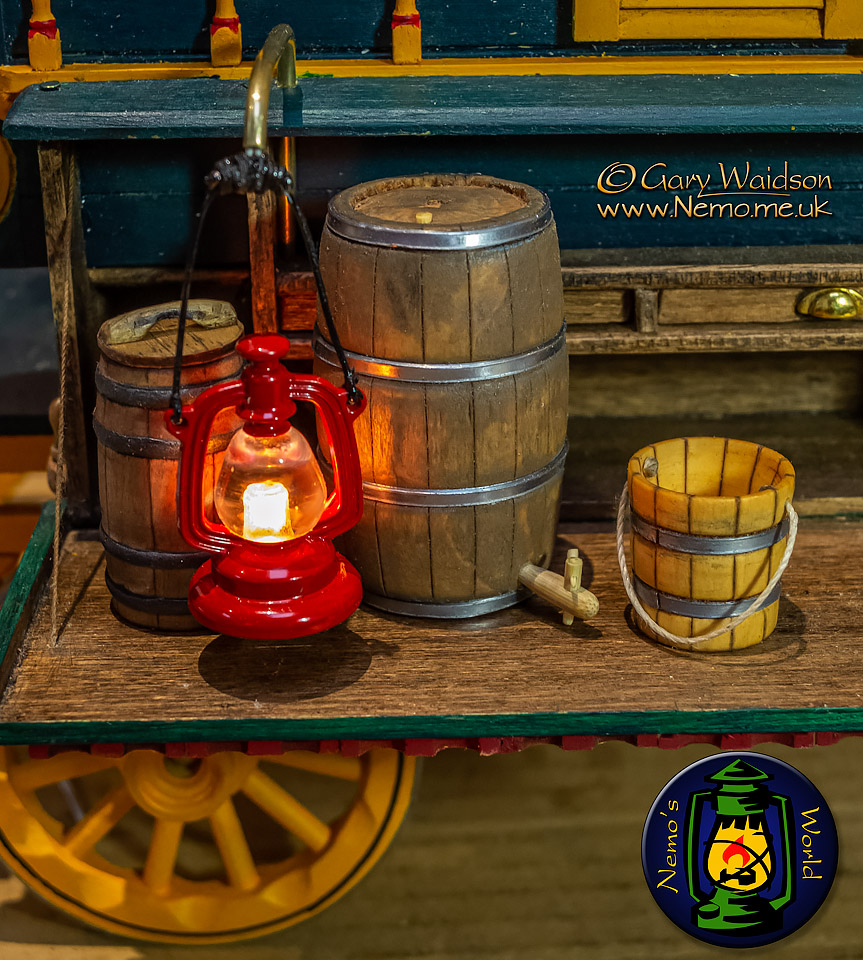
One of the things that I have found disappointing is the lack of good quality storm lanterns available in 1/12th scale.
The only working ones I could find ran off button cells and that would soon work out expensive.
I did manage to find some non working ones though and I decided to have a go at adapting one.
In case you haven’t worked it out yet, the handle has been replaced to provide the wiring for a small “grain of wheat” bulb drilled up into the base of the solid resin “glass”.
The power supply is the same circuit that runs the rest of the vans lighting and is connected through the tube acting as the hanging arm.
Oh yes, you can also see that I’ve converted the biscuit barrel from the last picture into a half descent wooden bucket and I’ve knocked up a wooden barrel tap from a cocktail stick and a garden cane.
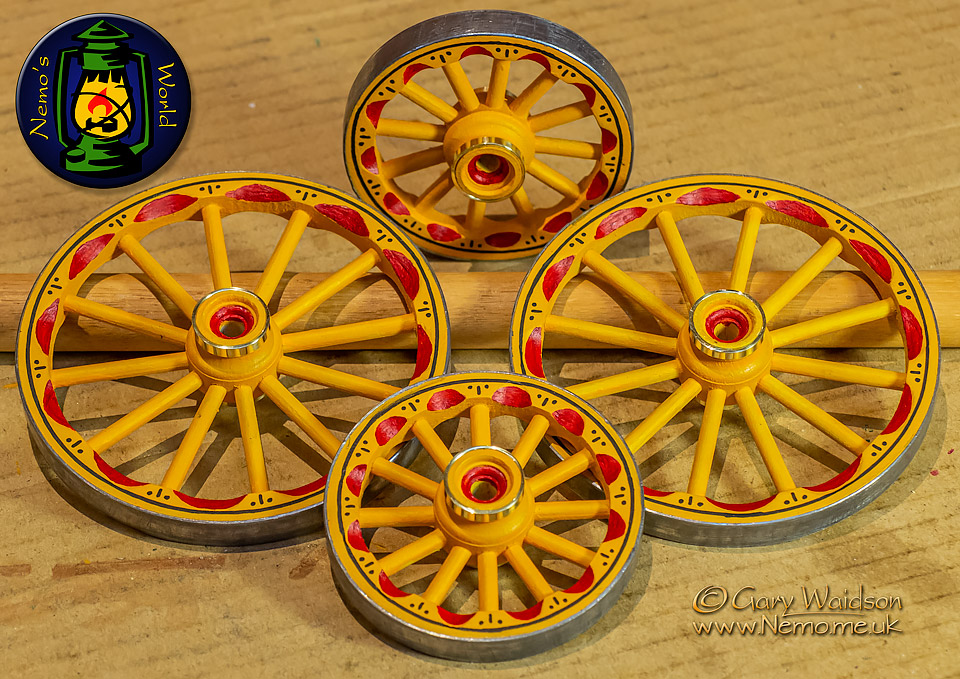
I also put in a little bit more paintwork on the wheels and added hub rings cut from a piece of brass pipe.
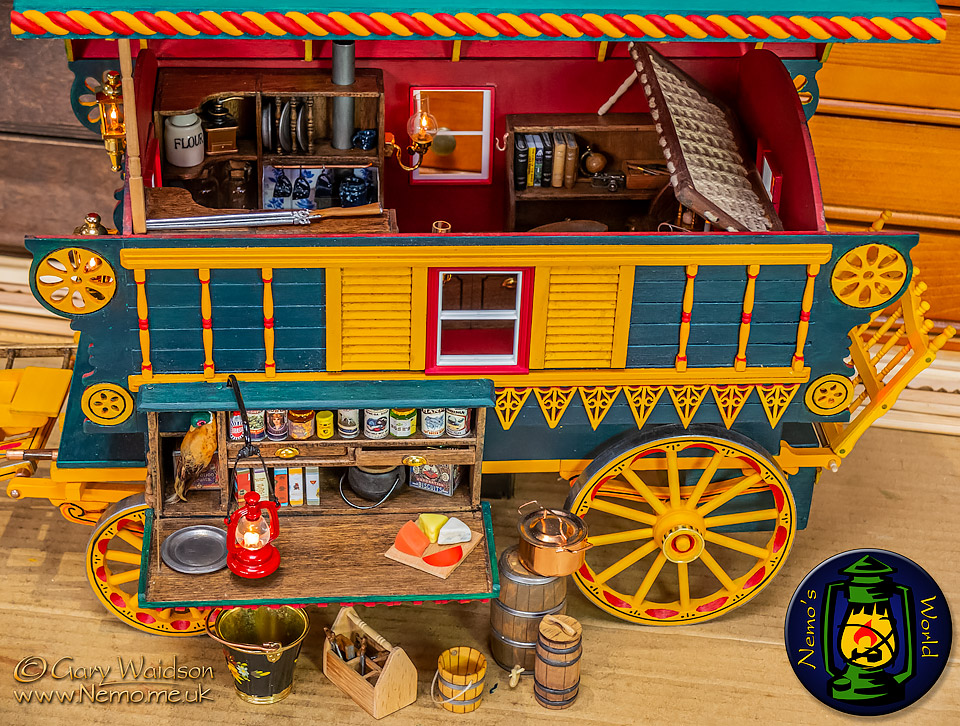
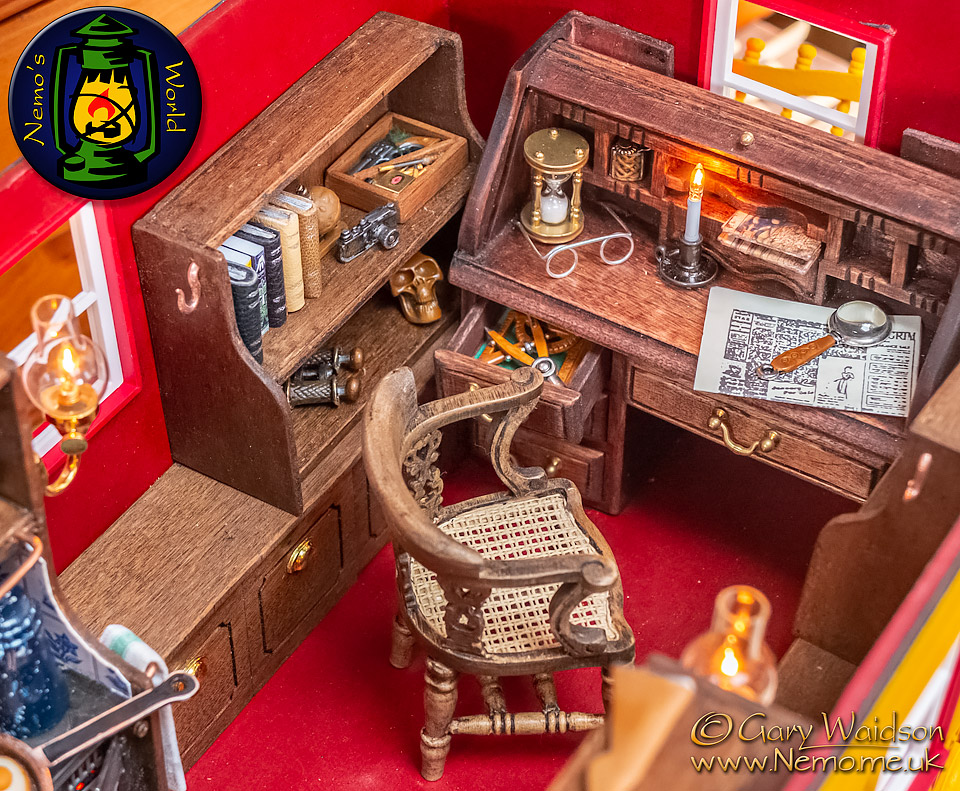
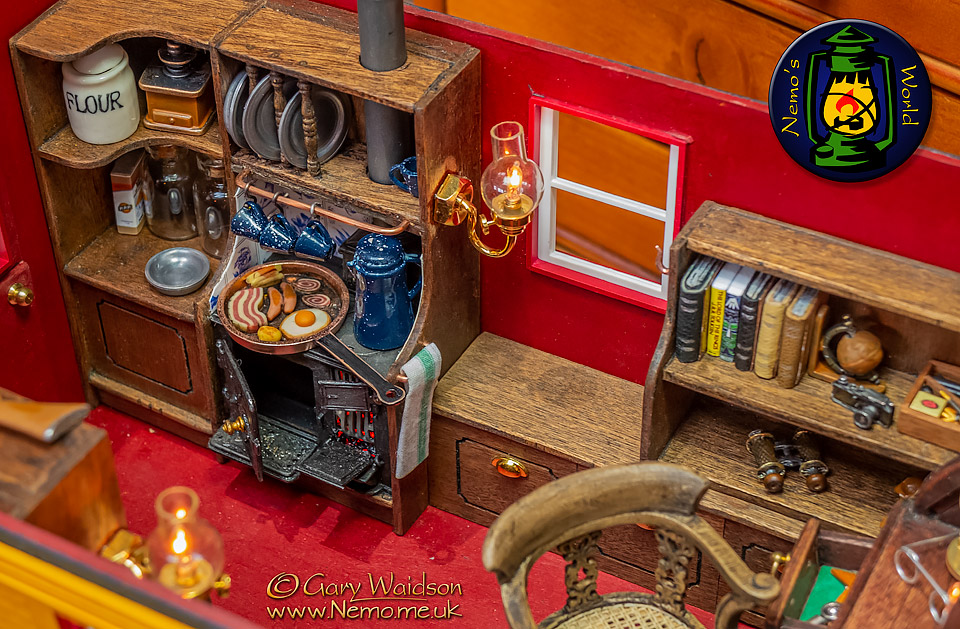
As the main build approaches completion, my mind turns now towards dressing it out.
These are just a few reference shots taken to remind me of the things I already have in hand for that purpose.
Although these shots are a long way off the finished layout, you can see that the chuck box is not far off and I have a few things ready for the camp too.
The desk end of the interior still needs a lot more details.
The stove unit is coming along nicely but will have more going on by the end.
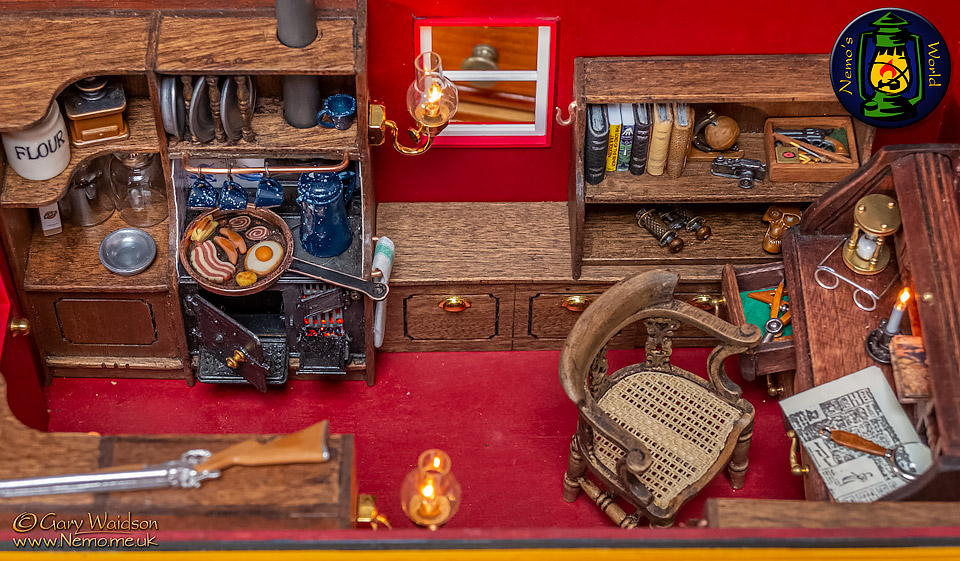
The nearside unit that you can not see into is pretty well empty at the moment but I have plans for that. The view of that side will hopefully be provided by some mirrors in the far side cabinets, which if I get the angle right will show parts of the near side.
The shotgun on top of the near side unit will eventually have it’s own gun box. You can see a pistol box on the top right shelf which gives you an idea of the finished item.
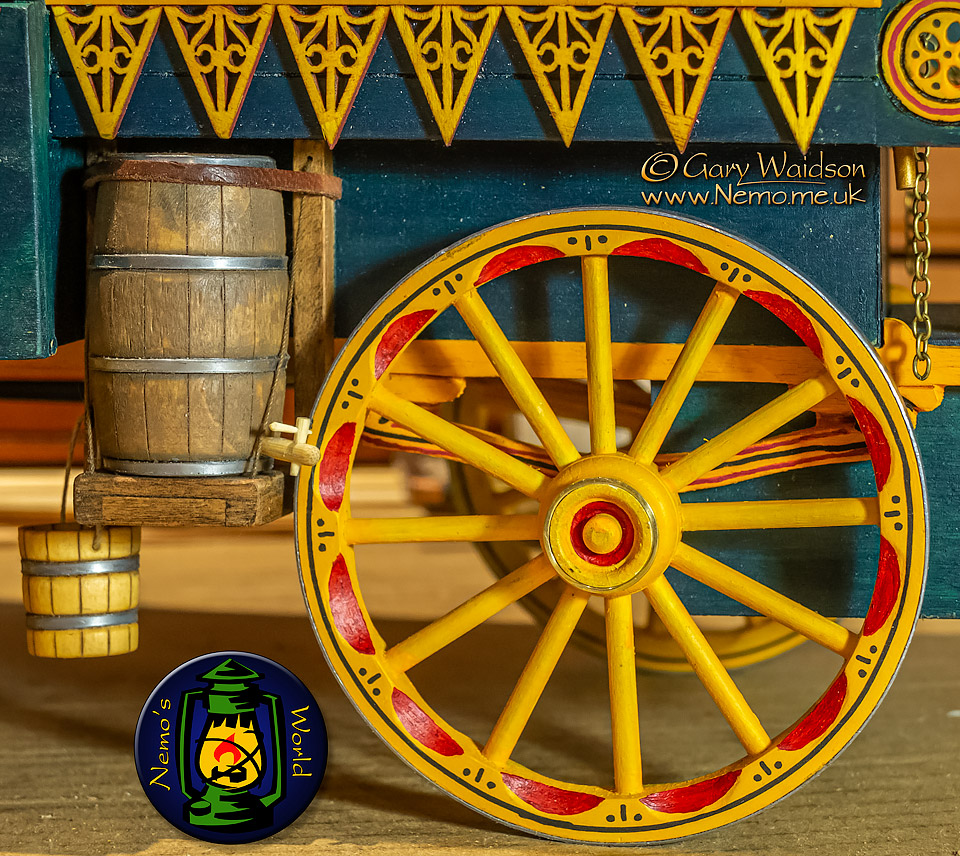
Finally got around to setting up the barrel carriage a few days ago but forgot to post it up.
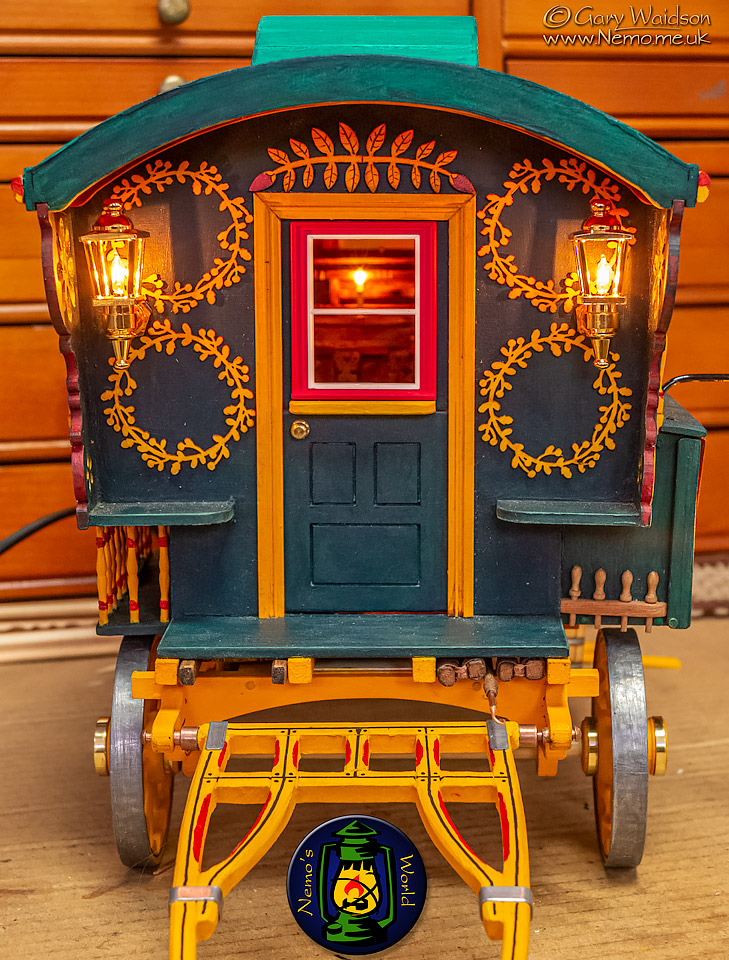
Today, I added some decoration to the porch.
Laser cut wood again but this time some “crafty” bits that I found in my local art store.
You might just be able to see a long pole hook which I also made to slide in between the awning poles under the van bed.
Traditionally these were used to hook dead branches out of trees for firewood.
Another job that I did today, that I had been putting off for a while, is building the trestles for the table.
I kept flip flopping between making them solid or packable. In the end I decided to go the packable route, which was a bit trickier but gave me more options.
I’m not sure about the awning at the moment.
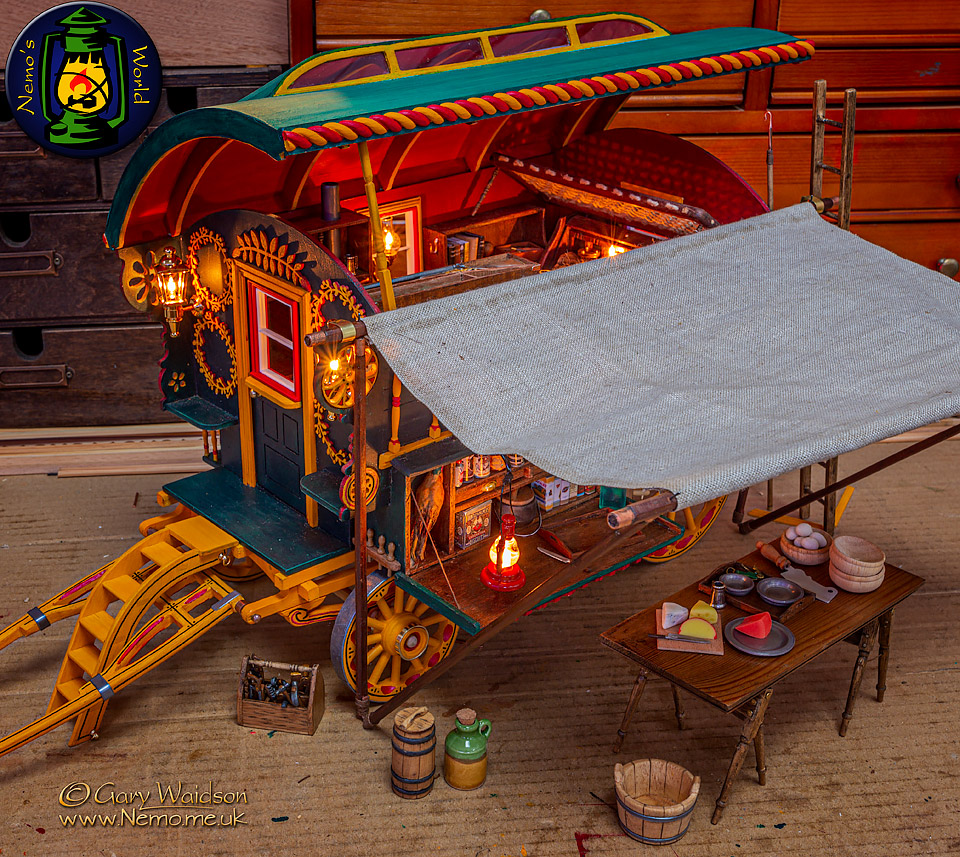
I like the material but I’m starting to think it is too heavy for the scale it is supposed to depict. Might have to re-do that.
17th February MMXX
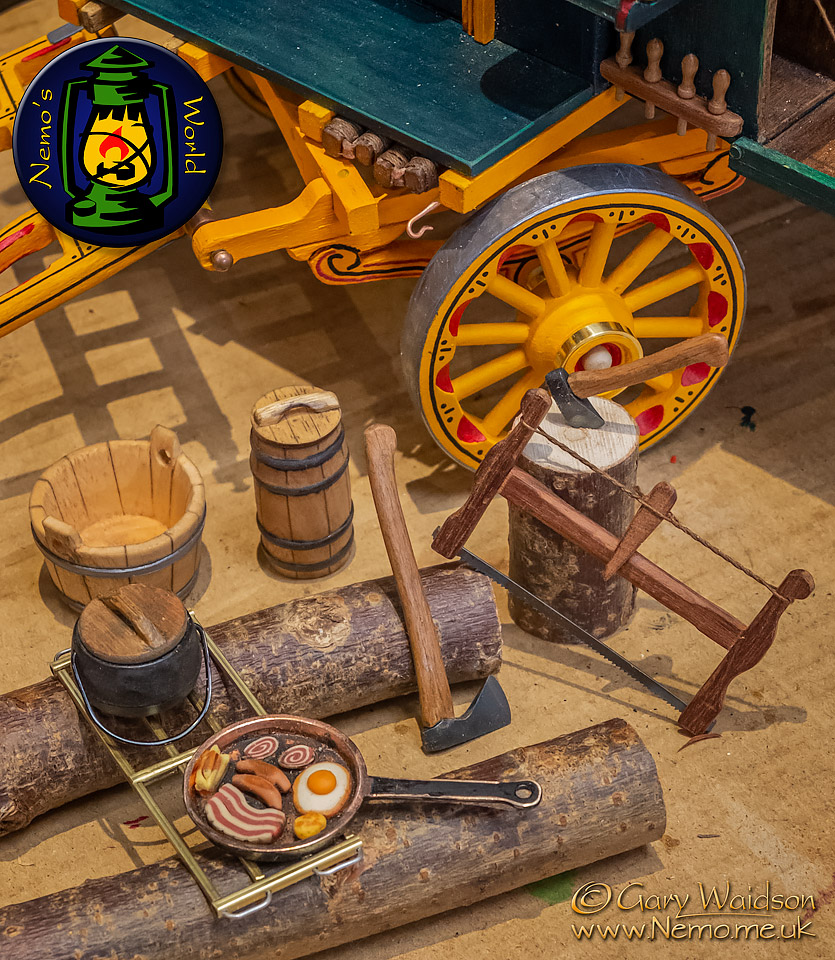
Starting to look at the camp furnishings, it wouldn’t be me if I didn’t have a camp fire with some cooking equipment.
While looking through my drawer of metal off cuts, I spotted some brass box section that I thought I could turn into a grill. A little bit of drilling and filing later and this is what we have.
I had intended to secure it with glue but actually it friction locks well enough that I don’t think it’s needed.
The idea of course is to build an illuminated fire pit between the logs, in pretty much the way we tend to do on sites that we are able to have a ground fire. A lot more work to be done on that part.
What I was originally looking through the drawer for was some bits that I could use to make the rest of the chitty irons with, so expect more on this subject.
Had a bit of spare time yesterday and thought those sawn log ends need a bit of justification so I knocked up a little frame saw too.
It used an old coping saw blade so in theory it is functional..
This morning I turned out a pair of axes from a piece of “01” tool steel, differentially hardened and given a decent edge on the whetstone. ( Definitely not toys! ).
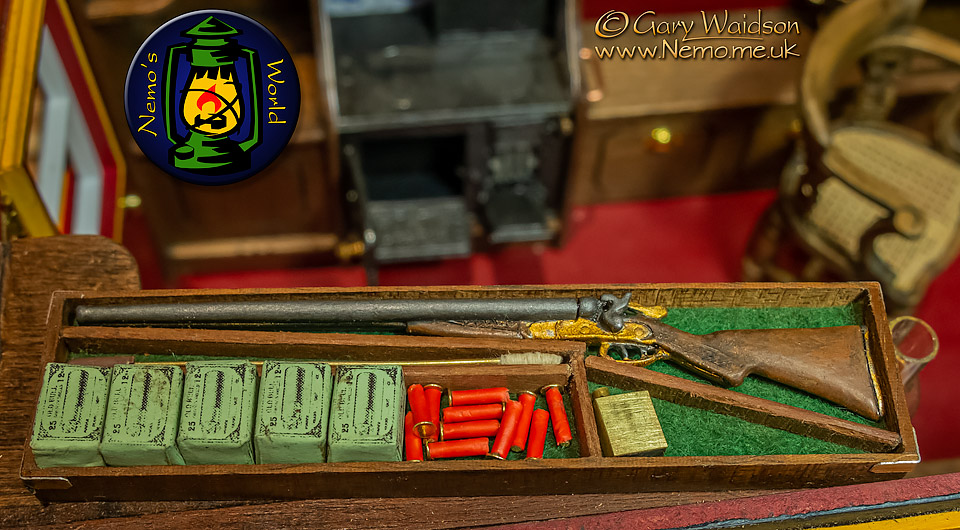
I was looking at some wire insulation clippings on my workbench when an idea struck me. I needed a few shotgun cartridges for the gun box and the wire insulation looked about the right colour.
My first thought was to paint on the brass ends but then my eye fell on some brass pins, used for fixing model railway tracks but something I often use for other jobs.
The insulation needed a bit of stretching so I dropped the clippings into a mug of boiling water after which they slipped on quite easily. Clip and file the ends flat and hey presto!
I’ve added some shotgun shell boxes and cleaning equipment as well.
18th February MMXX
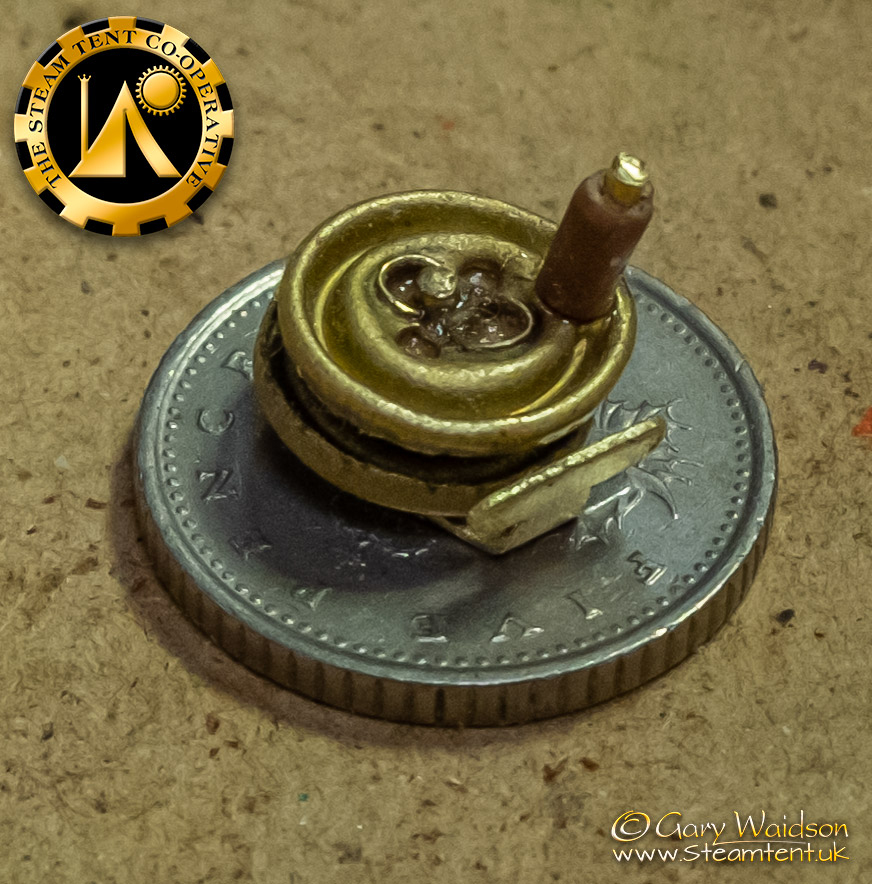
Buttons appear to be useful things. I have a tin full of vintage ones from my Mum’s house.
These two are now serving well as a fishing reel. Guess what I’m making now?
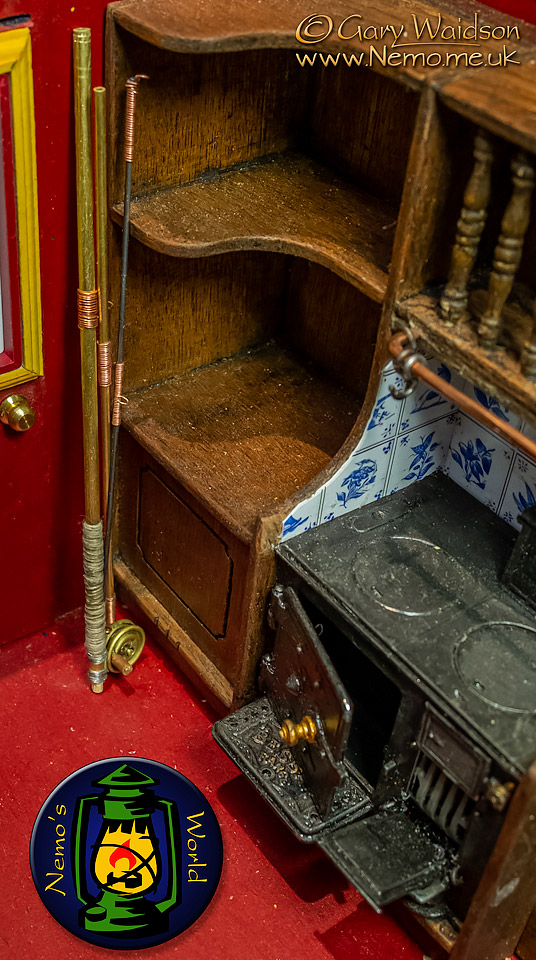
Did you guess right?
It’s unpainted in this picture but you can see it’s made from nesting tubes with a bit of piano wire for the end.
The loops are made from copper wire stripped out of a power cable and the handle wrapped with thread.
It all fits together but will probably spend most of it’s life like this.
I finished it off with some enamel paint and made a small fly for the line. (Many years since I did any fly tying.)

19th February MMXX
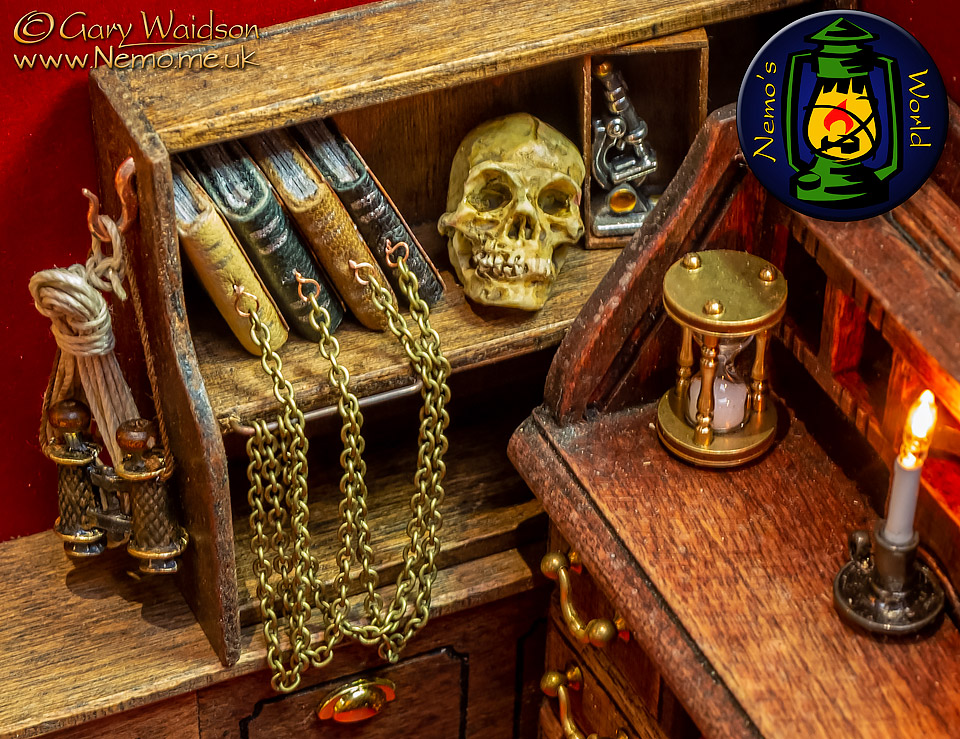
Watching "Game of Thrones" the other evening, I decided I needed a chained library in the Vardo. (Not that I don't like lending my books out you understand.)
Wire salvaged from old power cables and a bit of chain from a cheap pendant with two holes drilled into the shelf edge using a pin vice. The wire is not glued in case I want to add more books later.
20th February MMXX
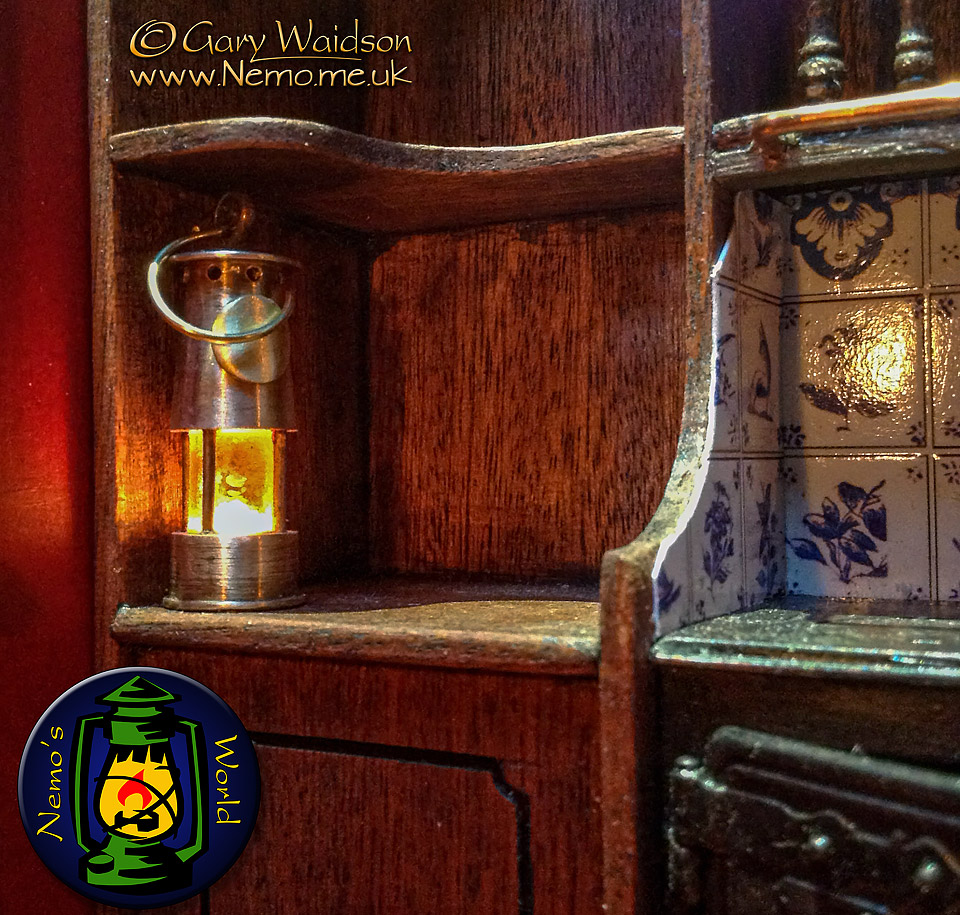
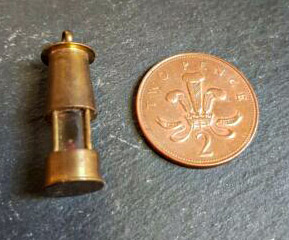
I spotted this miniature miners lamp keyring on eBay and although the vendors picture lacked detail, I thought it had potential for a conversion.
I’m very glad I took the chance. It’s a tiny bit over scale but it’s the closest I‘ve seen yet.
I added a bit of detail like the vents, handle and identity plate but drilled out for a grain of wheat bulb it makes a fine addition to the Vardo.
23rd February MMXX
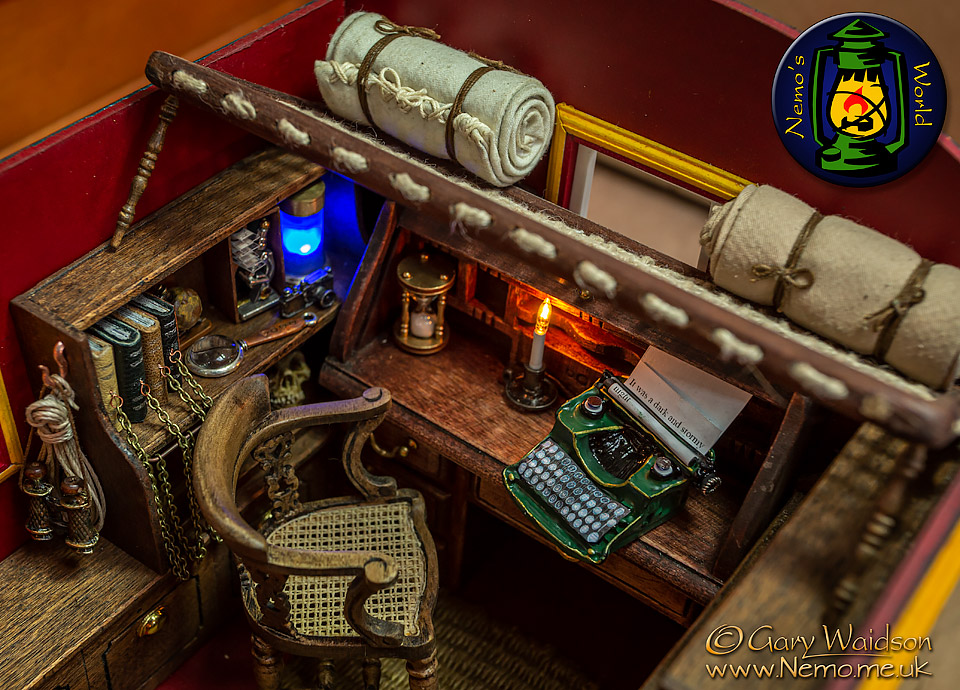
Just finished the mattress and bedding rolls for the Vardo.
I'm using bias binding for the fine weave fabric but I've stuck it to some heavier linen to bulk it out and give it body.
The bindings are just heavy thread from my leather working kit.
I think this might be the first picture of the lightning in a jar too.
29th March MMXX
A lot can happen in a month. The World has been seized by the Corvid-19 Corona virus pandemic. The business I have built up over twenty years is in complete shut down and we are all locked down under emergency powers as never seen before in peacetime.
Strange days.
I took a break from the vardo to work on some of my living history projects, The Hárbarðr / Hrafn Casket and a treasure cover for a new manuscript of Beowulf.
Now I am ready to start the camp fire diorama.
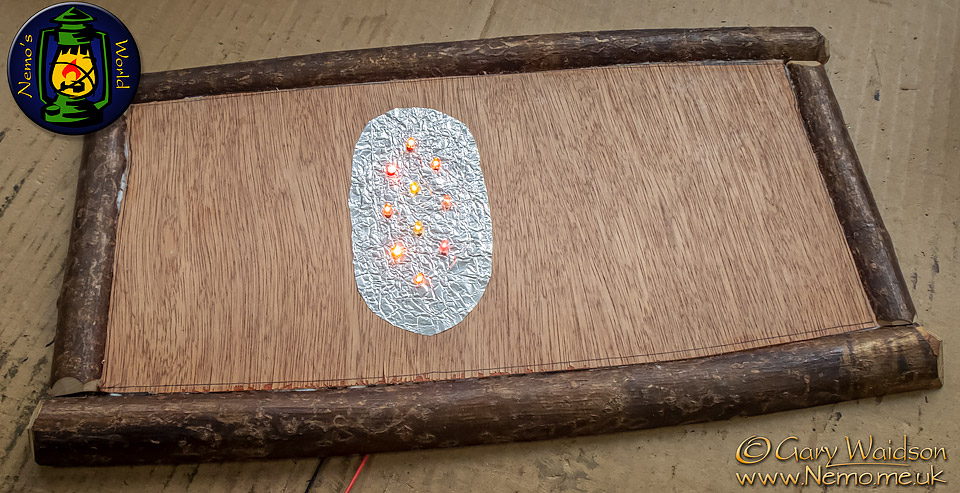
I want it to blend onto a table or shelf when it is displayed next to the vardo so I've halved some well seasoned sticks to simulate a log perimeter and built a platform on top so I can run some wiring underneath. I will add a more earth like surface later on.
The main feature will be the fire of course so I've installed red, yellow, and orange flickering LEDs on a foil reflector ready to build everything else on top.
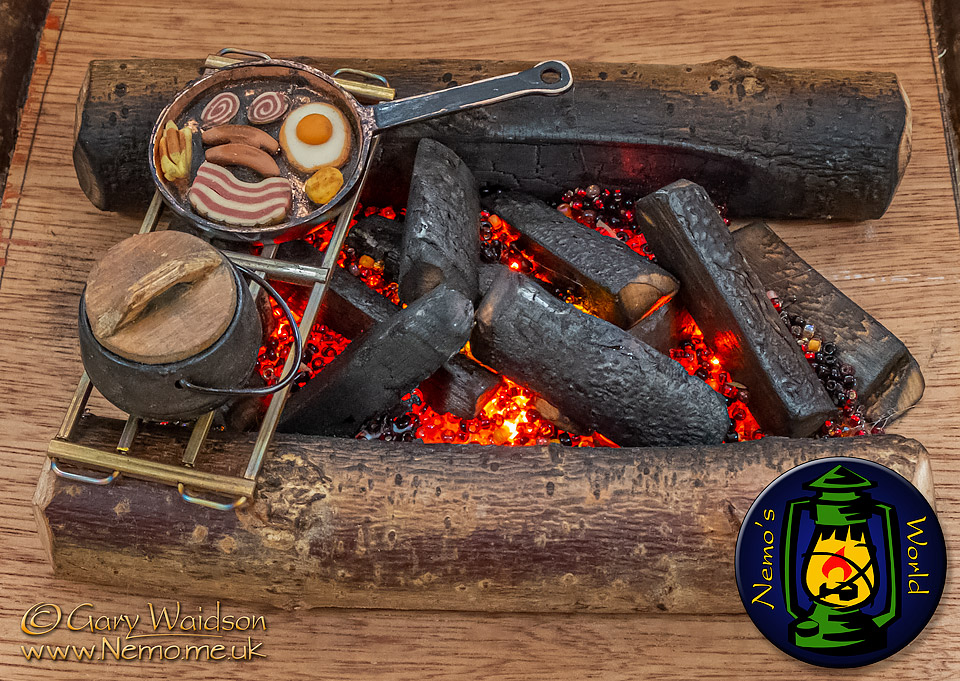
After a little tinkering, here you can see the bed of the fire laid in with scorched sticks and seed beans for the coals.
I don’t do much video but in this case I think it is justified to show how the different flickering LEDs finish the effect.
This is a long way from finished but gives you a better idea of the layout and the wider scene.
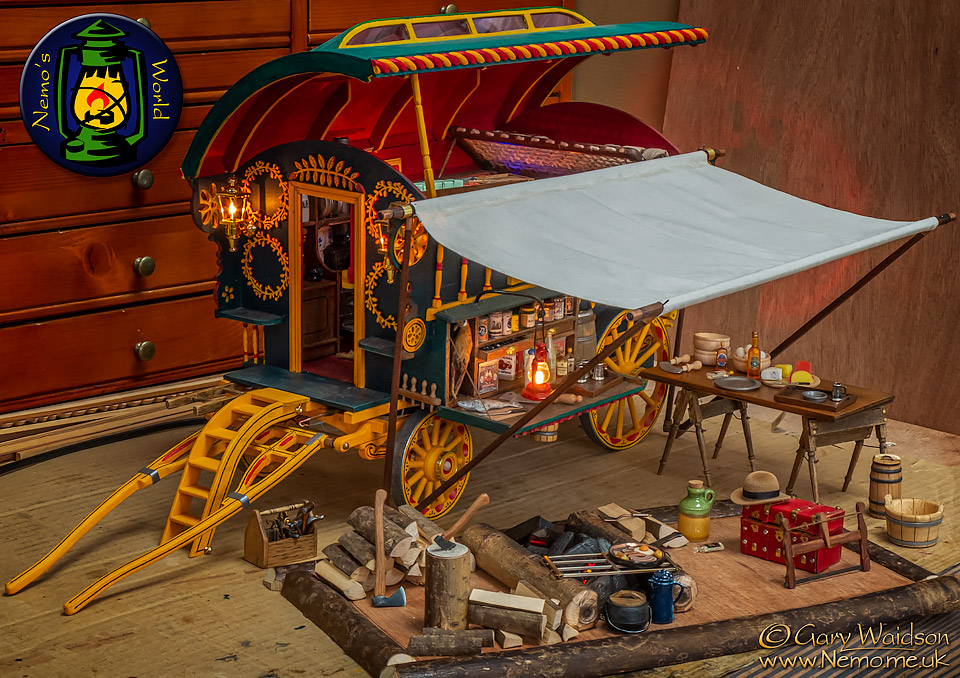
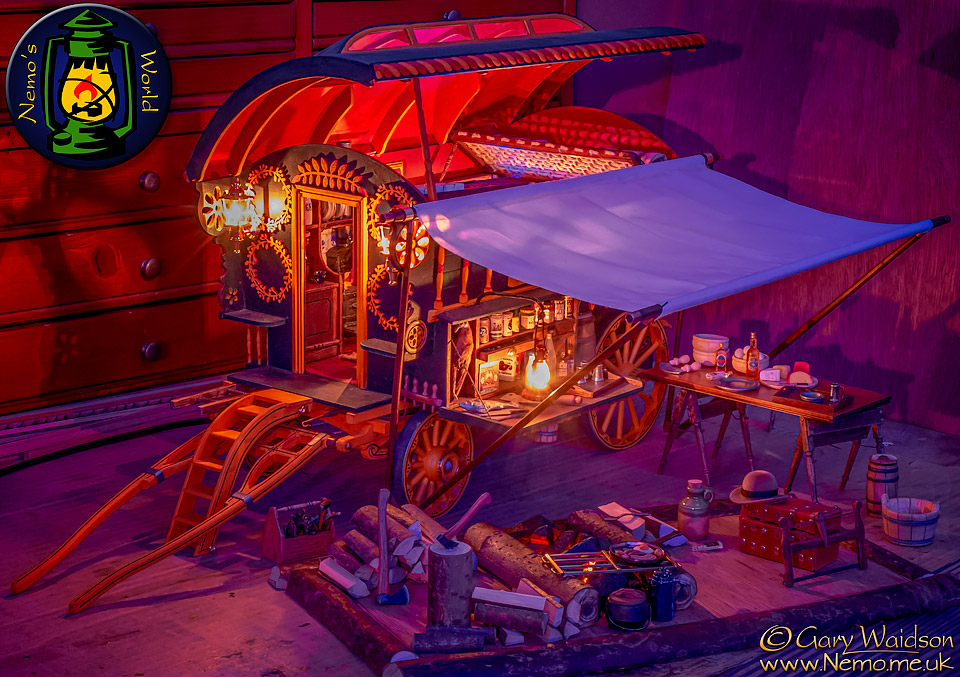
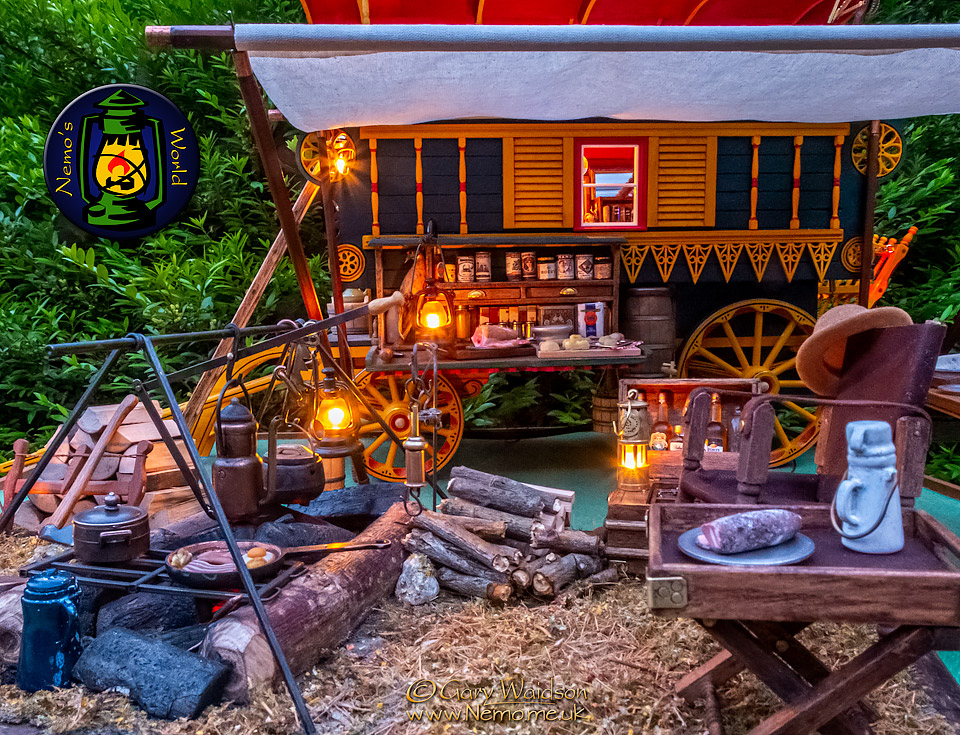
And the obligatory night shot too.
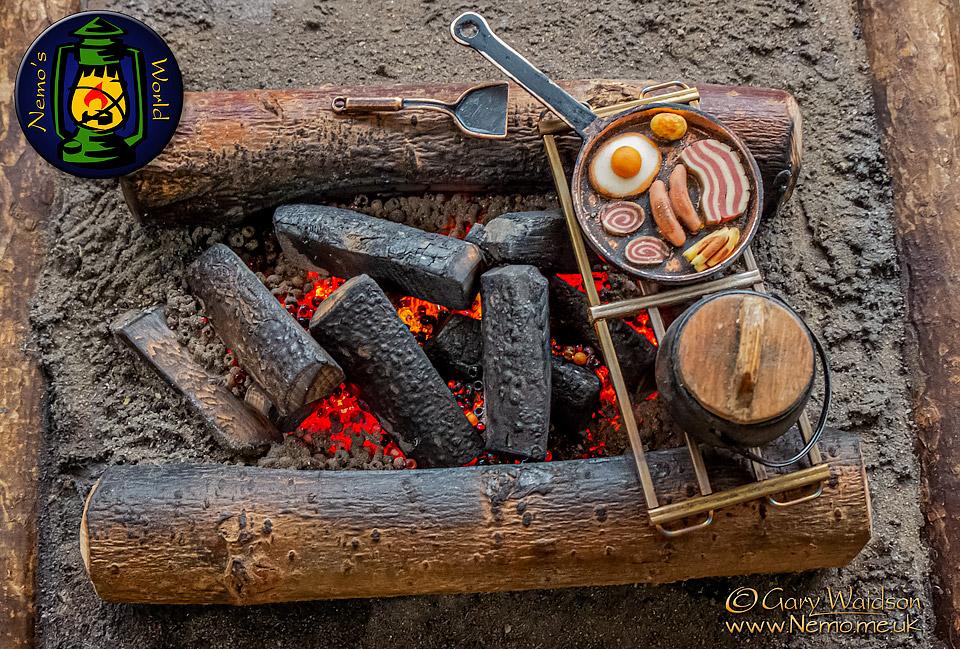
So, Returning to the fire place, I've sculpted the area around the logs with car body filler which I had in stock and which was grey.
Gave it a dark brown base coat with matt Humbrol enamel paint and while it was still sticky, added a dusting down with fine earth.
I'm now waiting for a grass mat to arrive which I'll try to feather in around the edges of the scorched earth to fill the rest of the platform.
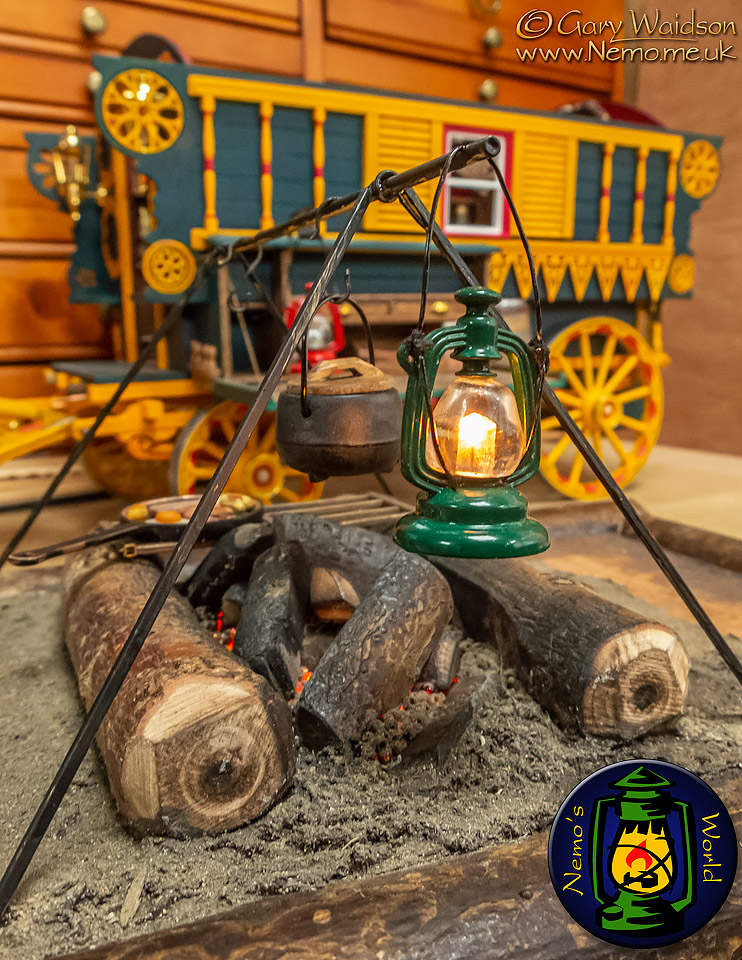
Wiring this fellow up was an interesting challenge.
It started out as a non working model of a hurricane lantern, so I drilled a 1/8th" hole up through the base and into the solid globe. This allowed me to slip a "grain of wheat" bulb into the clear resin with a drop of super glue to hold it.
I then cut the wires in the hollow base underneath so that I could solder two longer wires in their place.
I drilled a 1mm hole each side of the globe to pass the wires through and, having already removed the original wire bail handle, I took the wires up through the handle brackets and bound them in place with a little cotton thread.
The wires were now ready to replace the bail handle.
The pot support bar is actually a brass pipe, just wide enough to accept both wires.
The legs are also brass pipes but square sectioned this time and just wide enough for one wire.
So the wires from the bail now go through a slot on the top and through the bar.
The wires then exit the pipe though holes near to the joints and enter holes in the leg pipes to go down one of the legs at each end and through the base board.
Underneath, they are then soldered onto the bus bars that power the array of LEDs in the fireplace.
This is looking at the back of the diorama so you shouldn't notice the wires by the globe too much and in fact they match the lifting frame of a real lantern pretty well anyway.
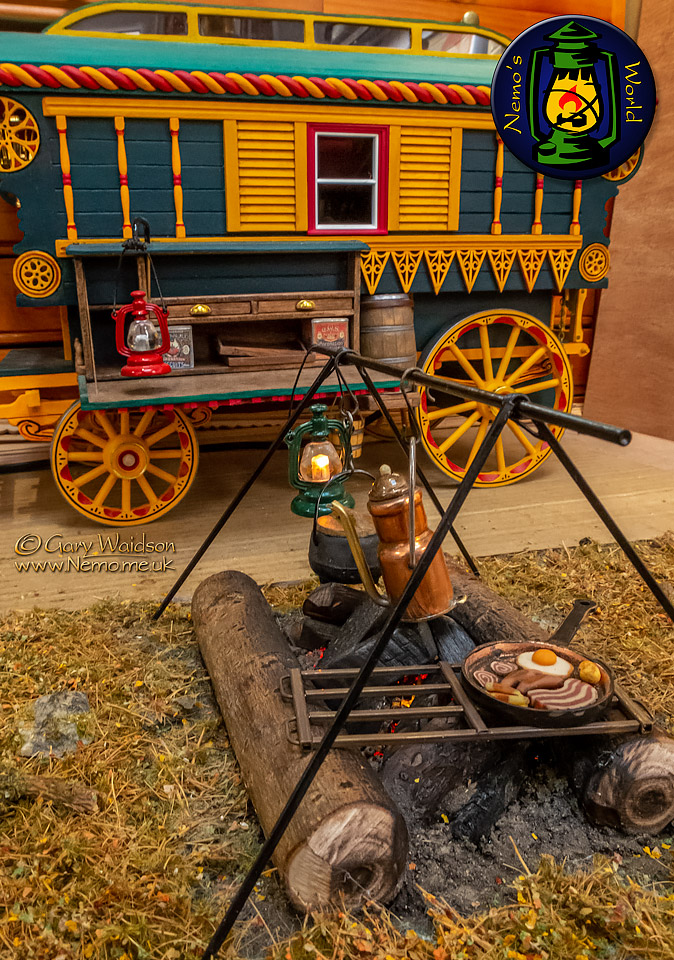
The latest instalment.
The terrain mat is in place on the platform now and I've built a hanging kettle from a pipe reducer and some scrap brass pipe and plate.
The lid was the top of a pen cap.
I'm aiming to make a kettle tilt for this but the first try didn’t work so I’m rooting through my scrap trays for the right materials now.
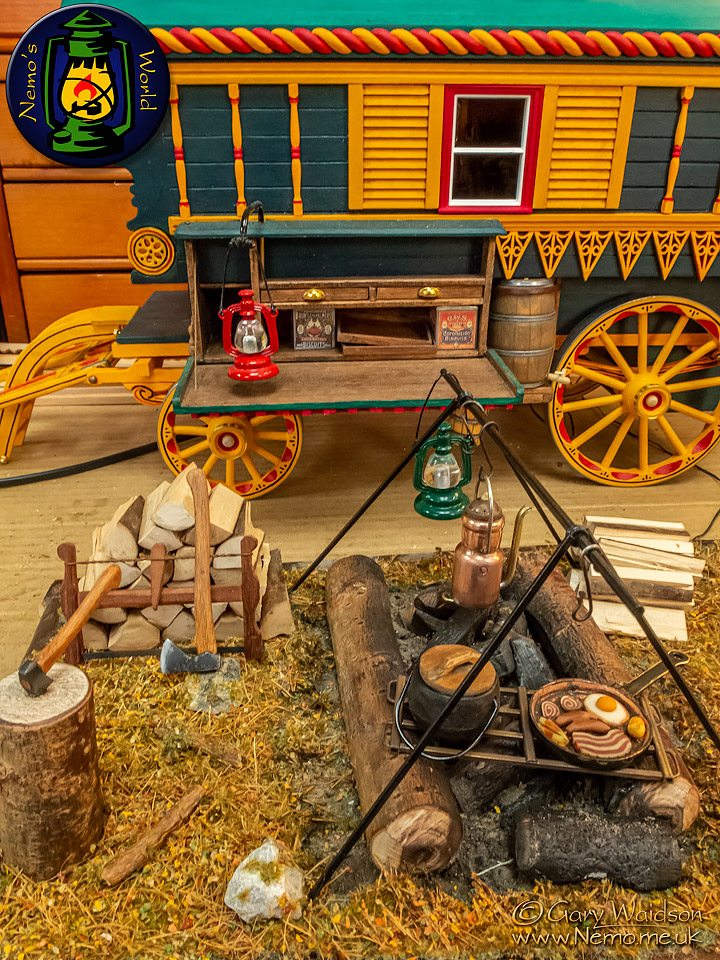
Added the log piles and a few tools...
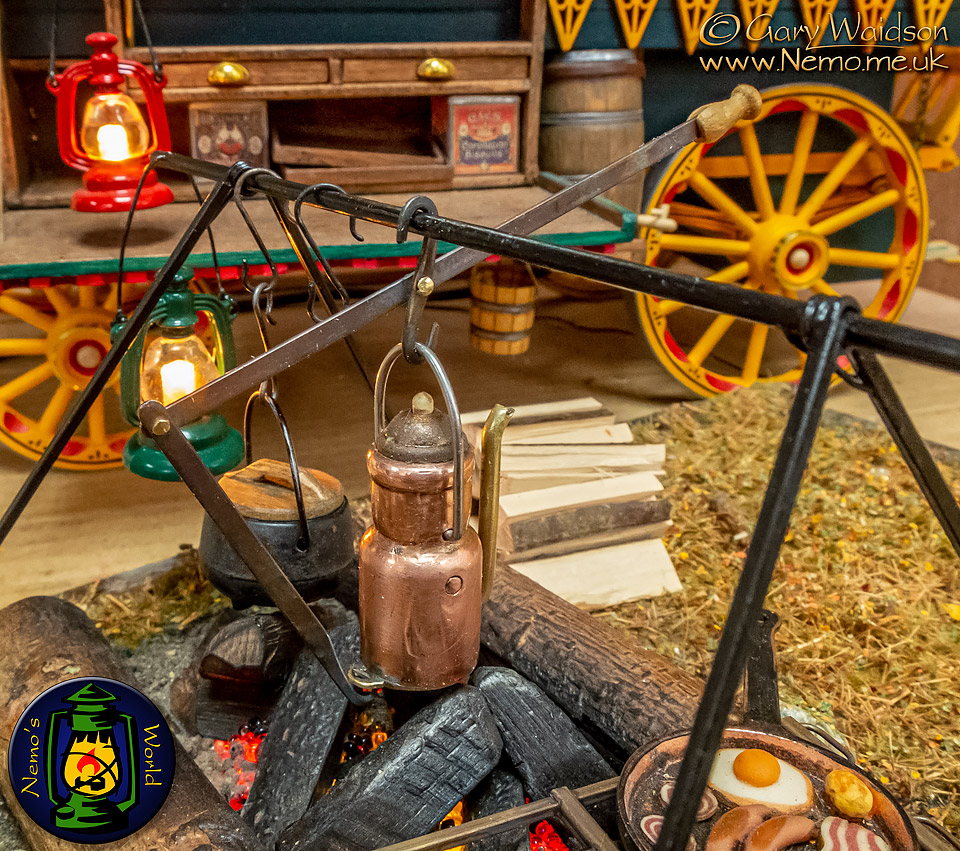
The first time I saw one of these kettle / coffee pot tippers was on a camp Riam had set up by his Vardo.
I thought it was so clever that I immediately started to think about whether it could be adapted to the kettle on the Steam Tent fire rig. The jury is still out on that one.
I certainly couldn't resist making on for this project though.
In case you are not mechanically minded, you pull down on the wooden handle and the connecting rods tip the kettle forwards to pour the water. Simple but ingenious.
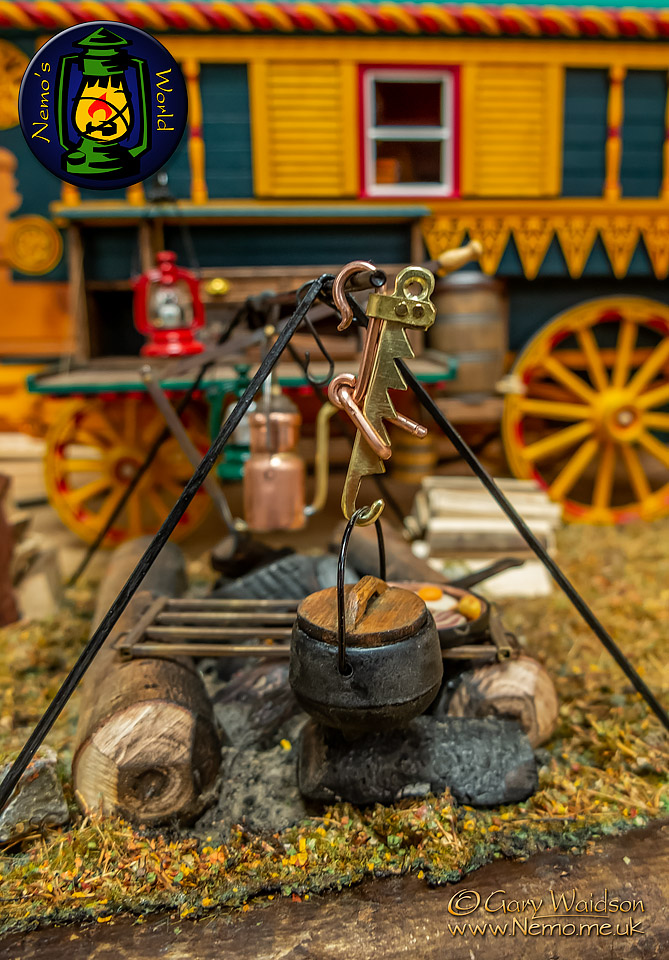
Another of the essential tools we use on the Steam Tent Co-operative fire rig is a trammel hook for raising and lowering the pots over the flames.
Think of them as the knob on the front of your cooker, for increasing and decreasing the heat.
Made from electrical wire and scraps of brass, this one has a limited range but fits on this rig well enough.
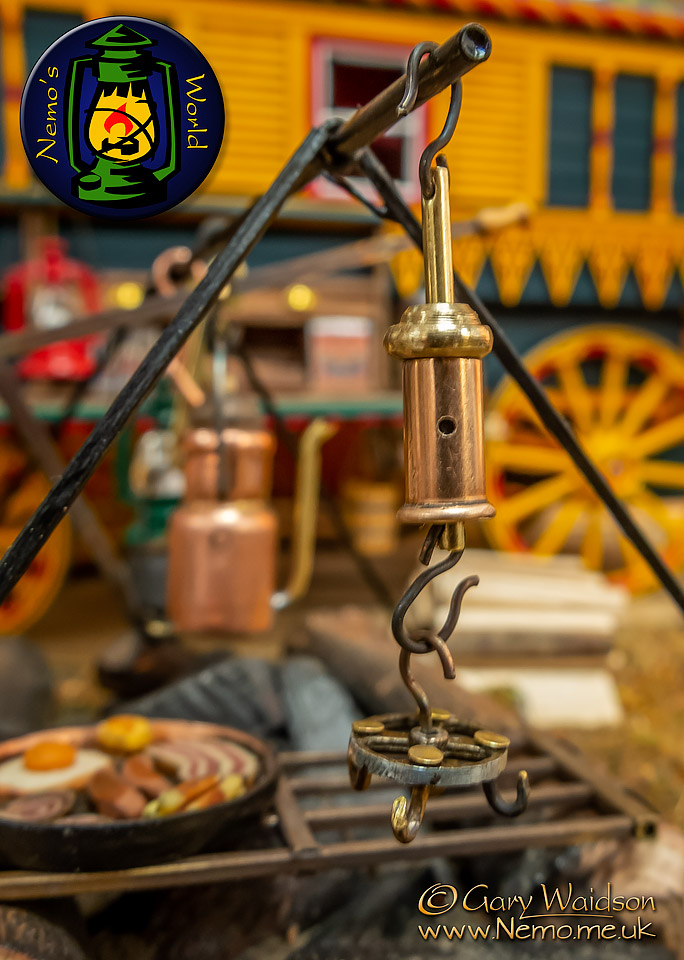
If you have ever cooked around a Steam Tent fire rig you will probably recognise this straight away.
A Bottle Jack. A clockwork device for rotating meat or poultry in front of the fire for roasting.
This one is made from a .22 shell casing and some bits of brass from my scrap drawer.
The counterbalance / meat rack is a cog with its teeth ground off and track pins for hooks.
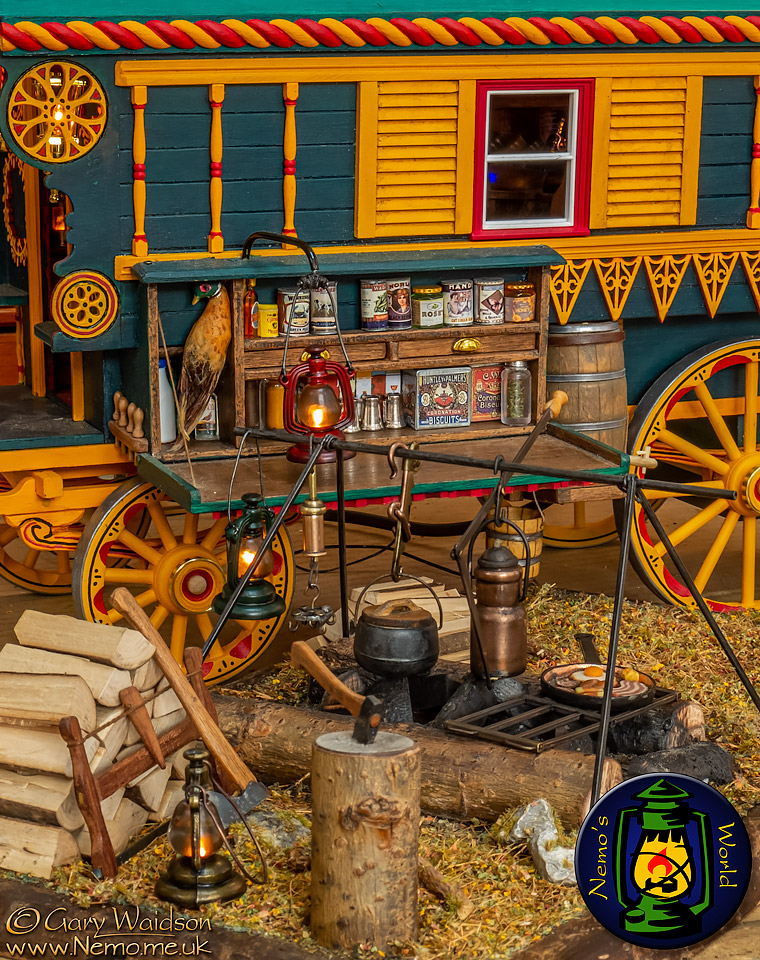
6th April MMXX
I’ve sooted up the lanterns a bit and cookware a bit more with a little paint so this end of the camp fire diorama is pretty well done now. Just a couple of small details to go in but I’m waiting on materials for those.
I want some seating and a fitted out travelling trunk for the other end.
I’ve a mind to build a Roorkhee chair but I haven’t decided for definite yet.
I may also add a small table like I would in my own camp.
I know it is uncharacteristic of me to publish video but this is a very short sequence to show how the light effects change at night. Literally just a minute of your time.
Music properly licensed under IAC Music Copyright Clearance Schemes
( MCPS, BPI, PPL and the Musician’s Union. )
9th April MMXX
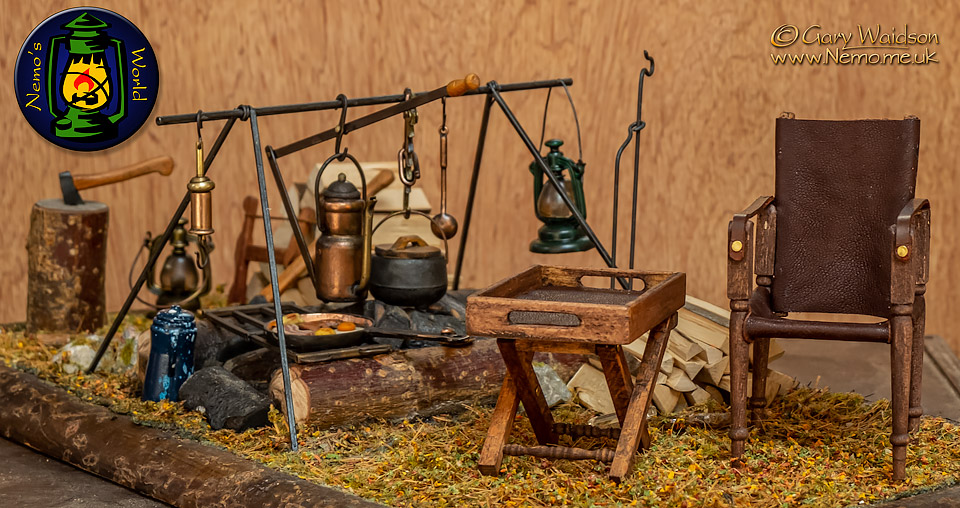
Committing it to writing above, made my mind up in the end. A Roorkhee chair it is.
I have long pondered making a full sized one of these for camp but never got around to it. Perhaps making one at this scale will be the first step.
I added a small butlers table to go with it, a little luxury goes a long way when camping.
11th April MMXX
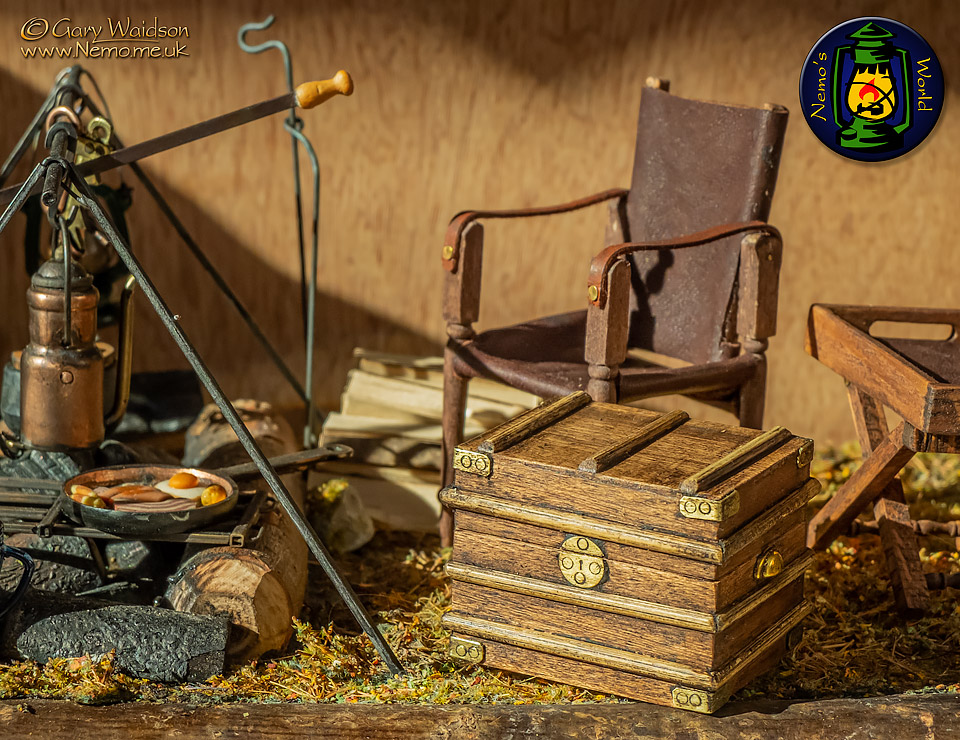
The travelling trunk is another scratch build.
Working with offcuts of mahogany and bamboo skewers sanded half flat for the ribs.
I’ve trimmed it with brass and I used some hinges and handles that I had left over from another part of the build.
12th April MMXX
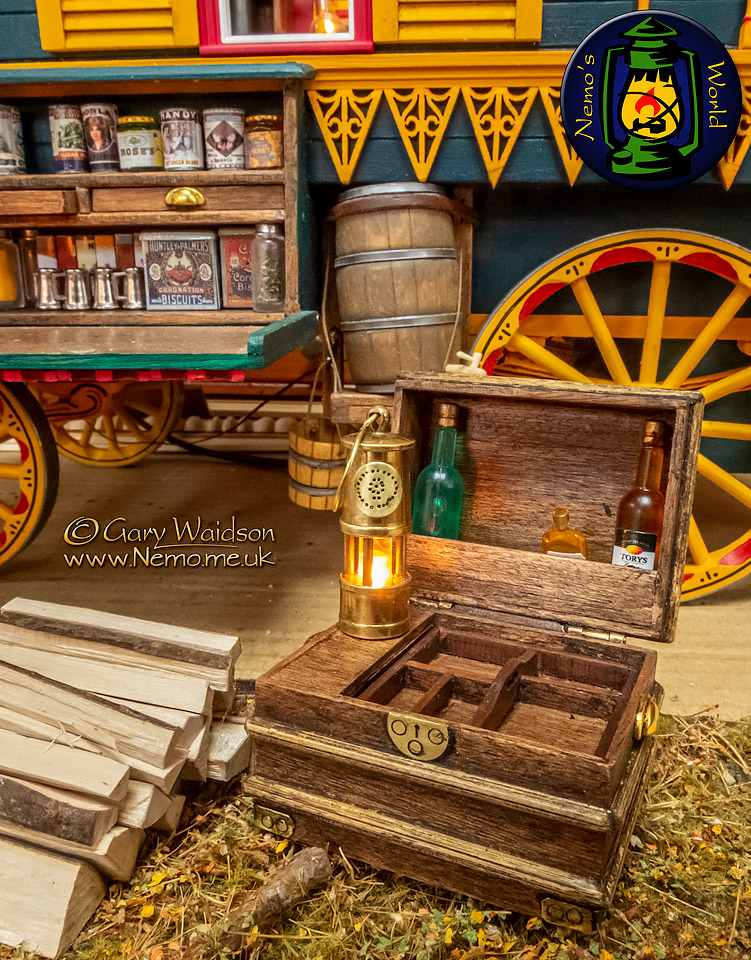
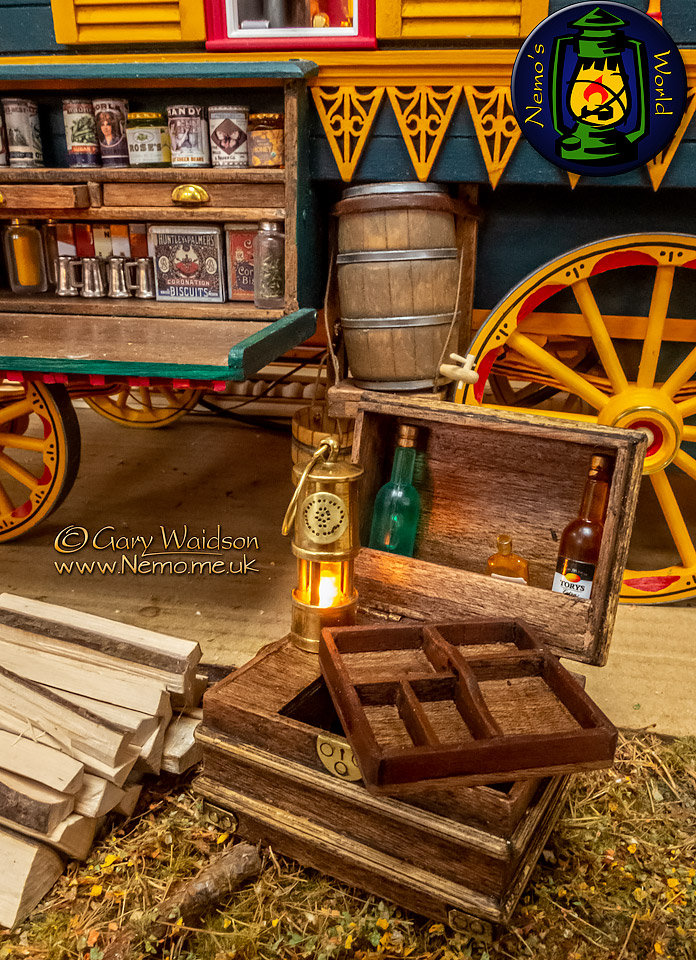
I’ve laid the inside out as a drinks cabinet in the lid and a gentleman’s “Ditty Box” in the base. The tray lifts out for access to the base and I’ve included a lighting position for another mining lamps as well.
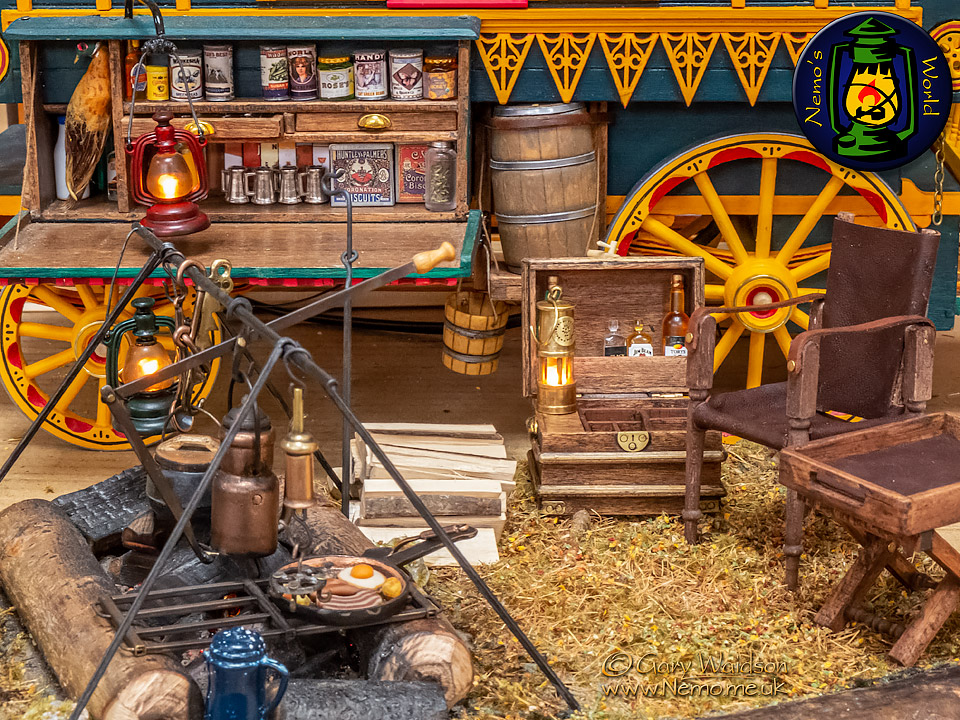
This gives you an idea of how it will fit into the wider scene when it is fully dressed out.
24th April MMXX
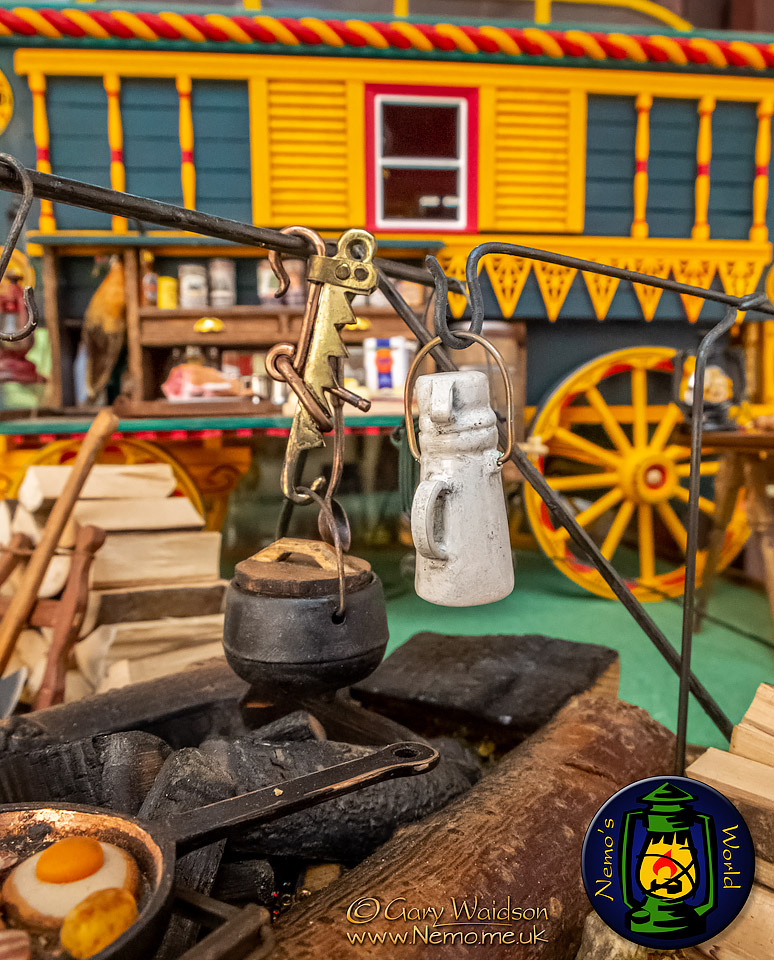
Another small but essential addition to the fire today and my first attempt at using poly-clay for making miniatures.
My Tea Billy is used so much on camp that I couldn’t neglect to add one to this scene. Being quite a specialised item it was not surprising to find non on the commercial market, so that left making one from scratch the only real option.
I bought a mixed pack of colours for making food with, in fact you can just see an early attempt at making a roasted ham on the chuck box in the background, but this was the first bit of clay I was working with to try things out. Really didn’t expect it to work so well.
25th April MMXX
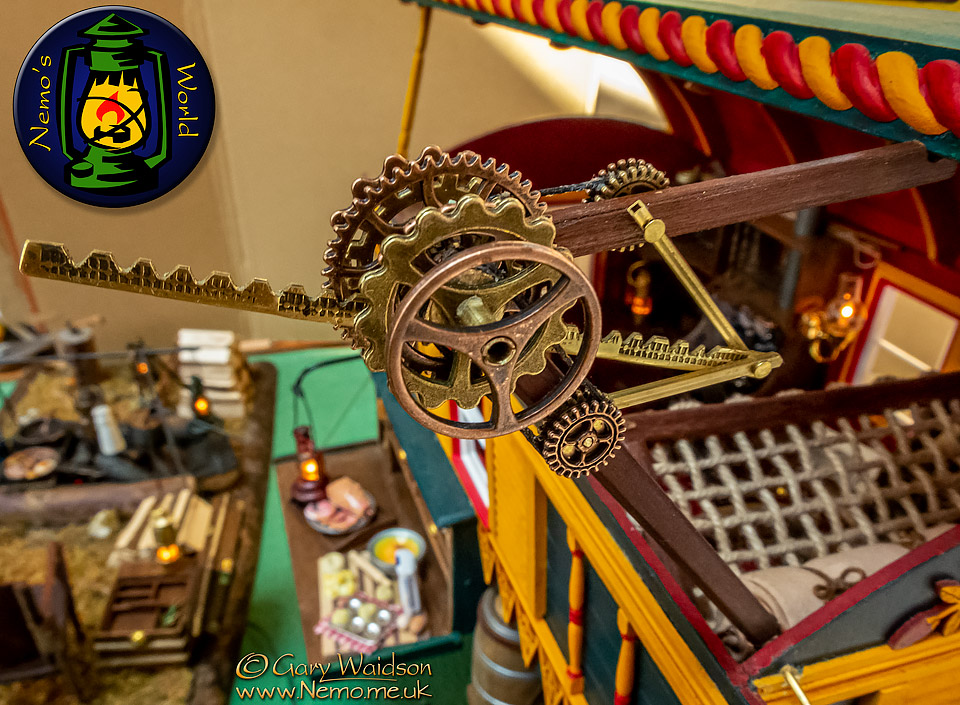
When on display I'm going to prop the roof up to give a view of the inside.
I wanted to address the logistics of actually raising the roof and as it was something that would not be done in reality, I decided to take a walk down the fantasy road for this one.
A totally over the top, steampunk style, scissor jack.
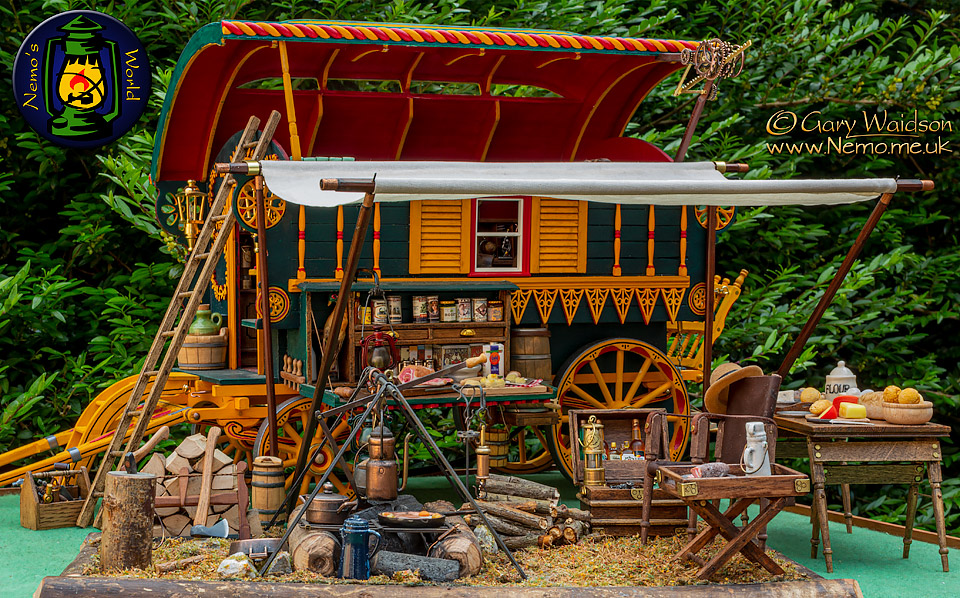
These show it in more context.
The first outdoor shots of the exterior pretty well done bar a few details.
6th September MMXX
There comes a point with a project like this that all the major jobs are done and it is just the small things that need finishing.
That point arrived a few months ago and as is my nature, I became distracted by some other things.
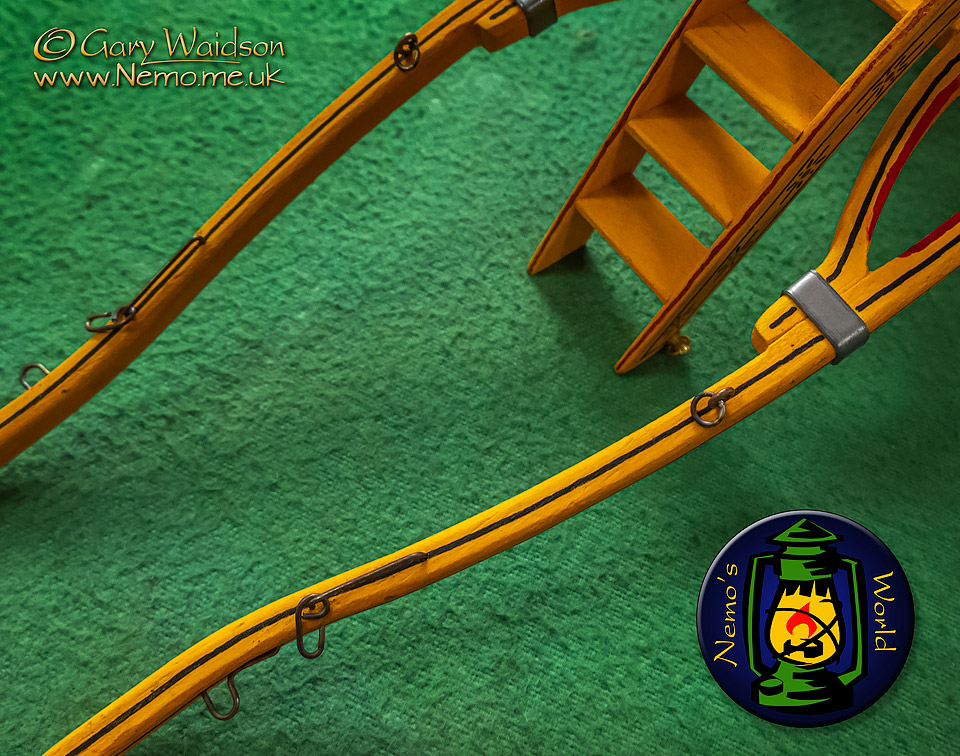
That did give me time to research a few details that I was unsure about. One such item was the ironwork of the cart shaft which surprisingly few pictures showed in detail.
I have since learned that from left to right we should have the “Tug Stops”, the “Breeching Staples” and the rings that I have not yet found a name for.
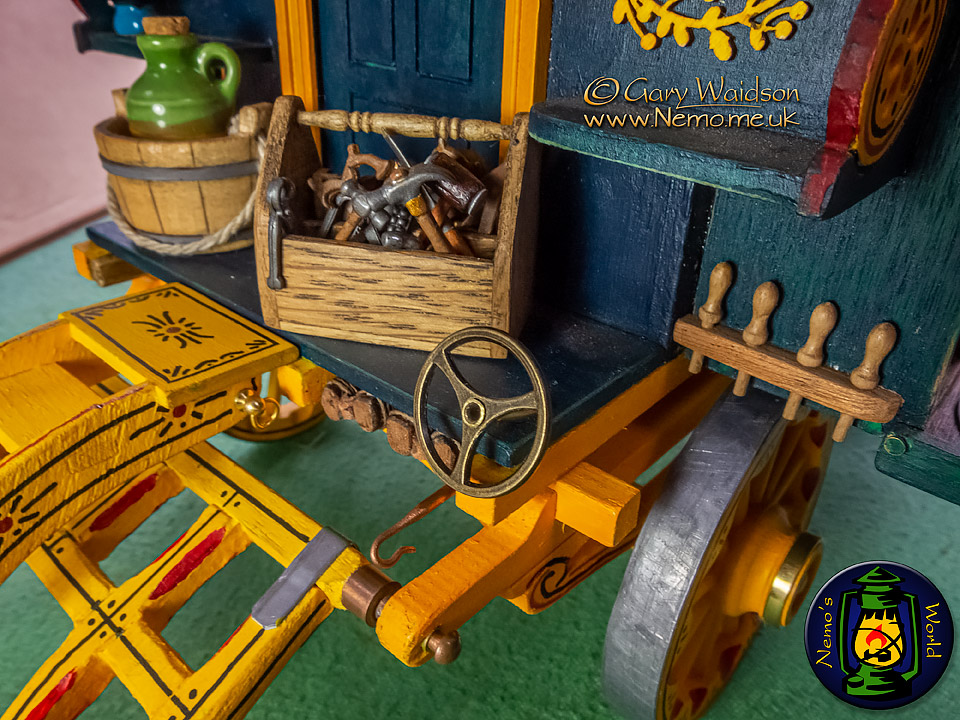
Another essential item was the Brake Wheel which applied braking to the real wheels when moving down hill. ( I will add the brake shoe mechanism later. )
I’ve added more decoration to the steps too.
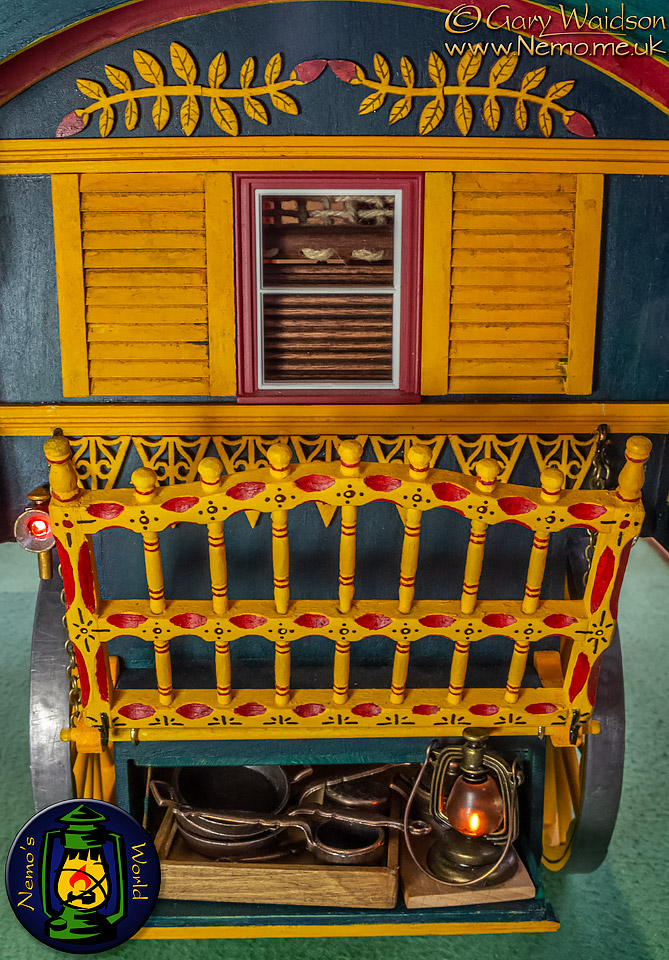
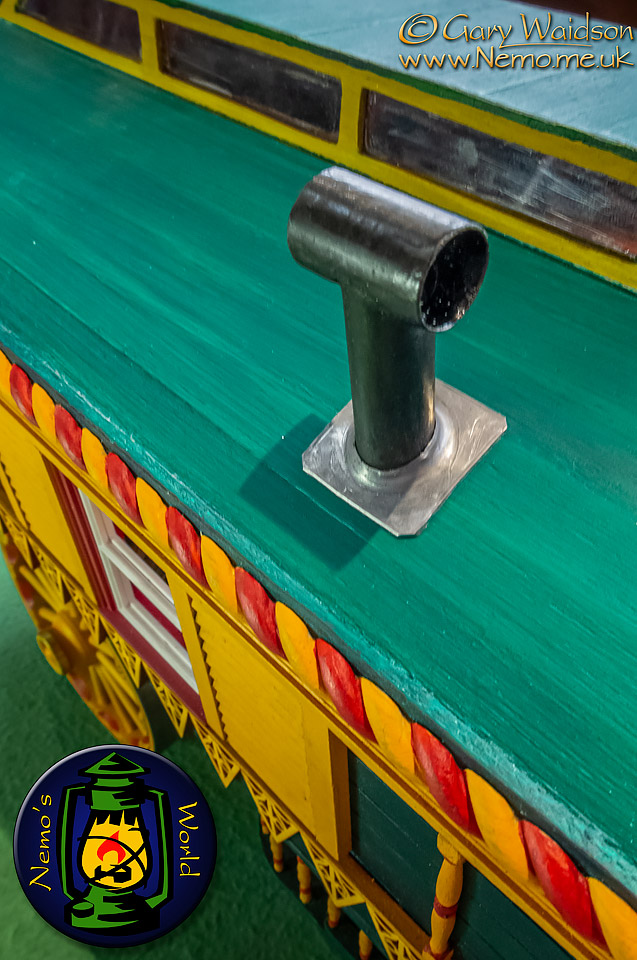
The Cratch also needed some more paint work and the chimney for the internal stove needed fitting.
The original that came with the kit comprised two simple pieces of dowel designed to simulate a chimney. As you might have guessed by now I wanted to do better than that so ended up building a proper flue and flashing it in place with lead.
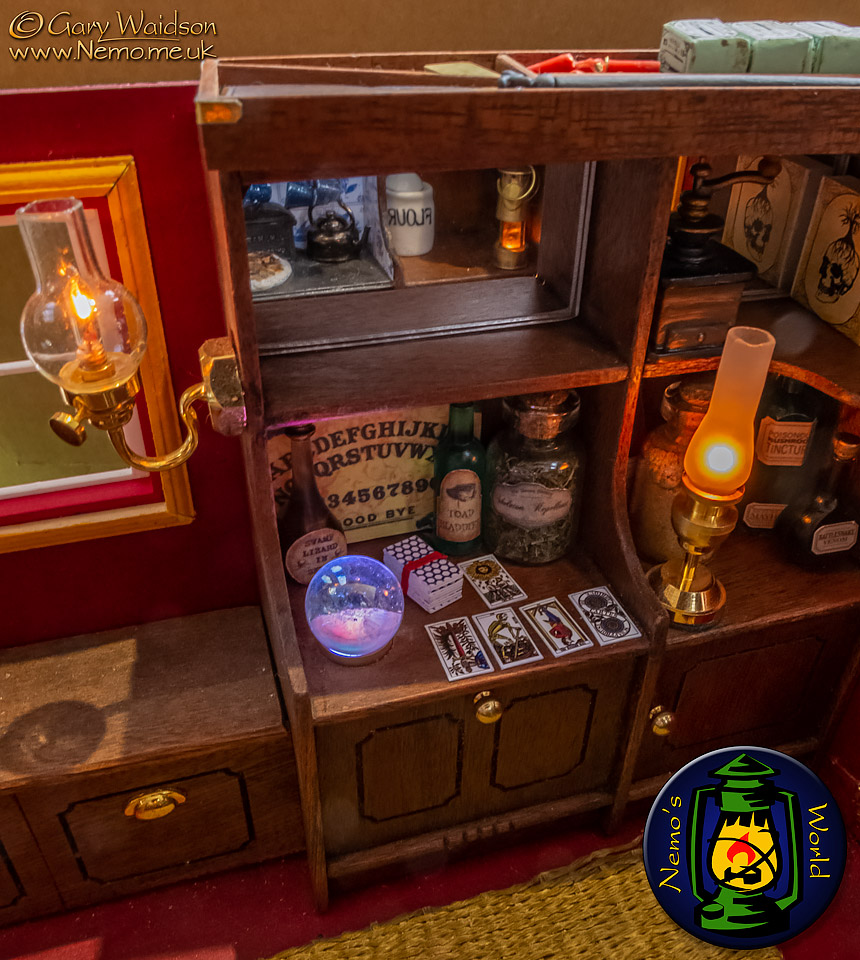
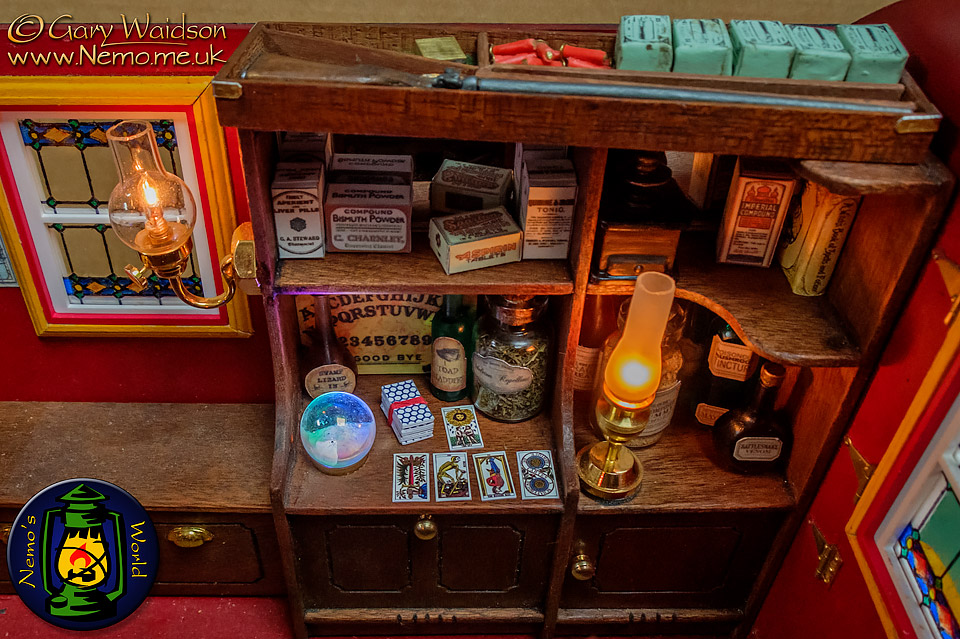
Some of the internal details need finishing off as well. This is the near side cupboard unit which is not directly visible when the Vardo is being is displayed but I added mirrors in both units which allow an indirect view.
This is a more “Esoteric” area reflecting the Victorian fascination with spiritualism and even the occult which is also in keeping with the Gypsy Fortune Teller tradition as well.
The Crystal Ball is illuminated by three colour changing LEDs which drop out of phase creating a constantly shifting colour scape.
The top shelves have yet to be fully dressed.
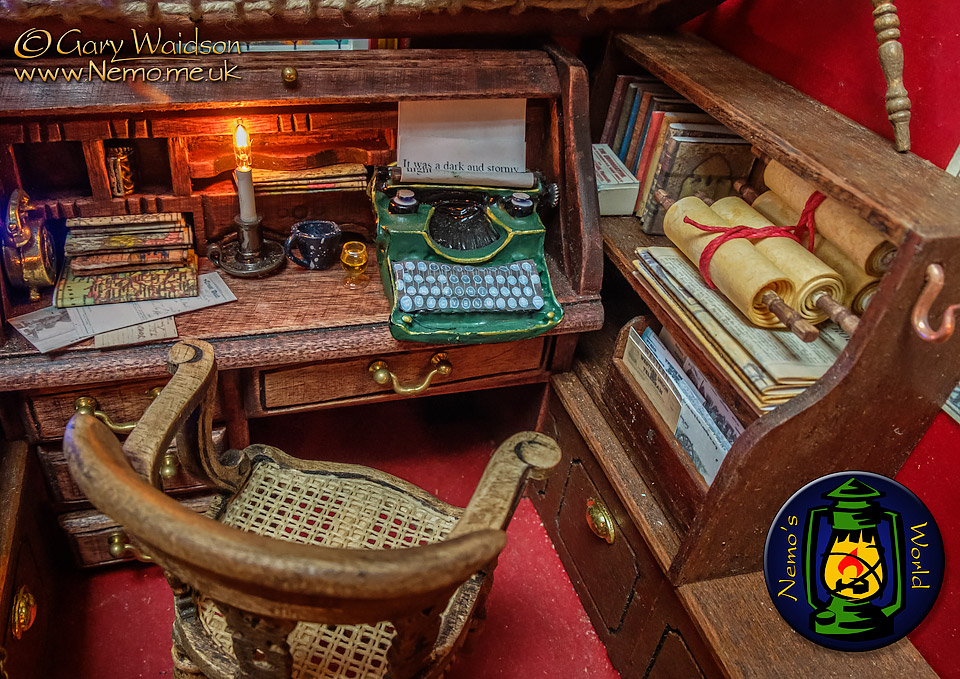
I have started working on a “Book Nook” project as well now but more on that elsewhere.
5th October MMXX
Having completed the book nook “Fingers End” it was time to complete a few details on the Vardo. I suspect this will be a project that I revisit every now and again so it may never be completely finished but it is not far from that destination now.
The port side cabinets are not directly visible in the normal display position but with the mirrors fitted on the starboard they need to be filled out as they can be seen there.
I also added a few more papers on the desk too.
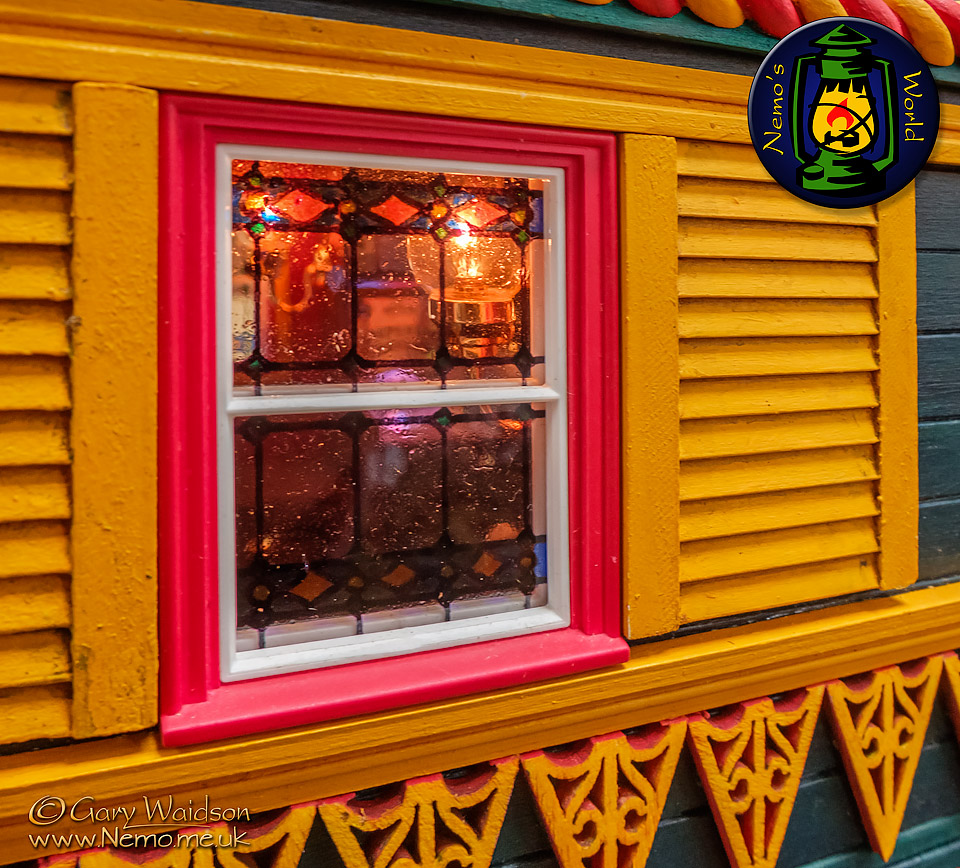
A few medicinal compounds help to fill the front port side cabinet shelving and you can see I’ve finally got around to glazing the windows.
The stained glass was produced with overhead projection markers and a coat of varnish protects the colours and also creates that “aged glass” look.
At night, with the lights behind them they do look quite effective.
A project like this is never completely “finished” but slowly it gets overtaken by other ideas. I am now starting the design phase of my next modelling project now. Ammon Rock, A 1/12th scale Gothic Lighthouse.
I may have to revisit this at some point to add a few more details that I have in mind.
